ClownMDEmu - The Greatest Mega Drive Emulator Ever (Someday)

Clownacy

Member
Messages
41
Since September last year, I've been working on-and-off on a Mega Drive emulator. It's not even close to being complete, but when will it ever be? So I figure that I might as well release it now, because there will always be some feature left to be implemented, or some game that doesn't work right. Waiting for it to be 'ready' is a fool's errand.

ClownMDEmu!
You'll never guess what the name's short for! :‎D

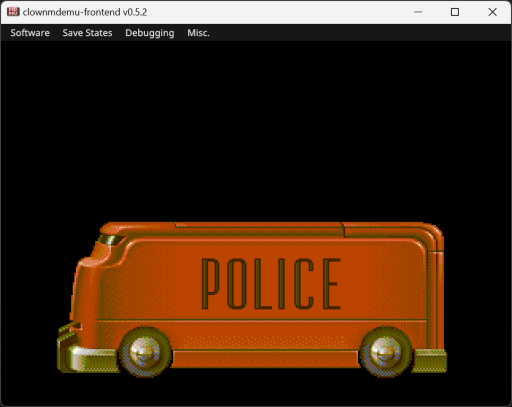
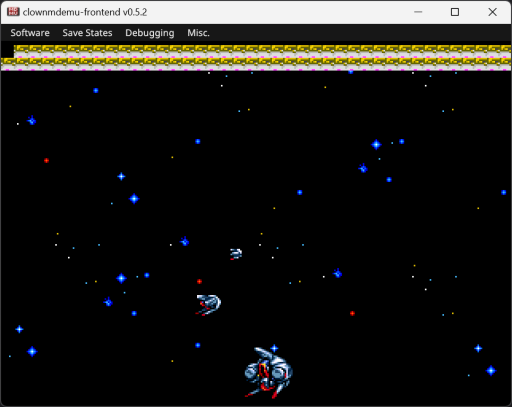
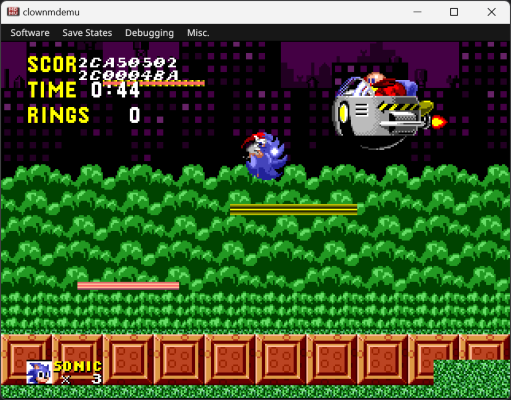
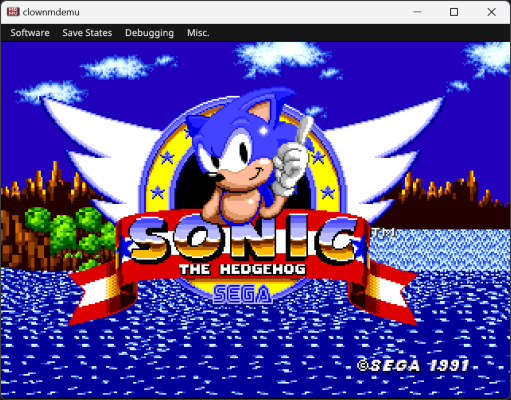
screenshot-minimal.png


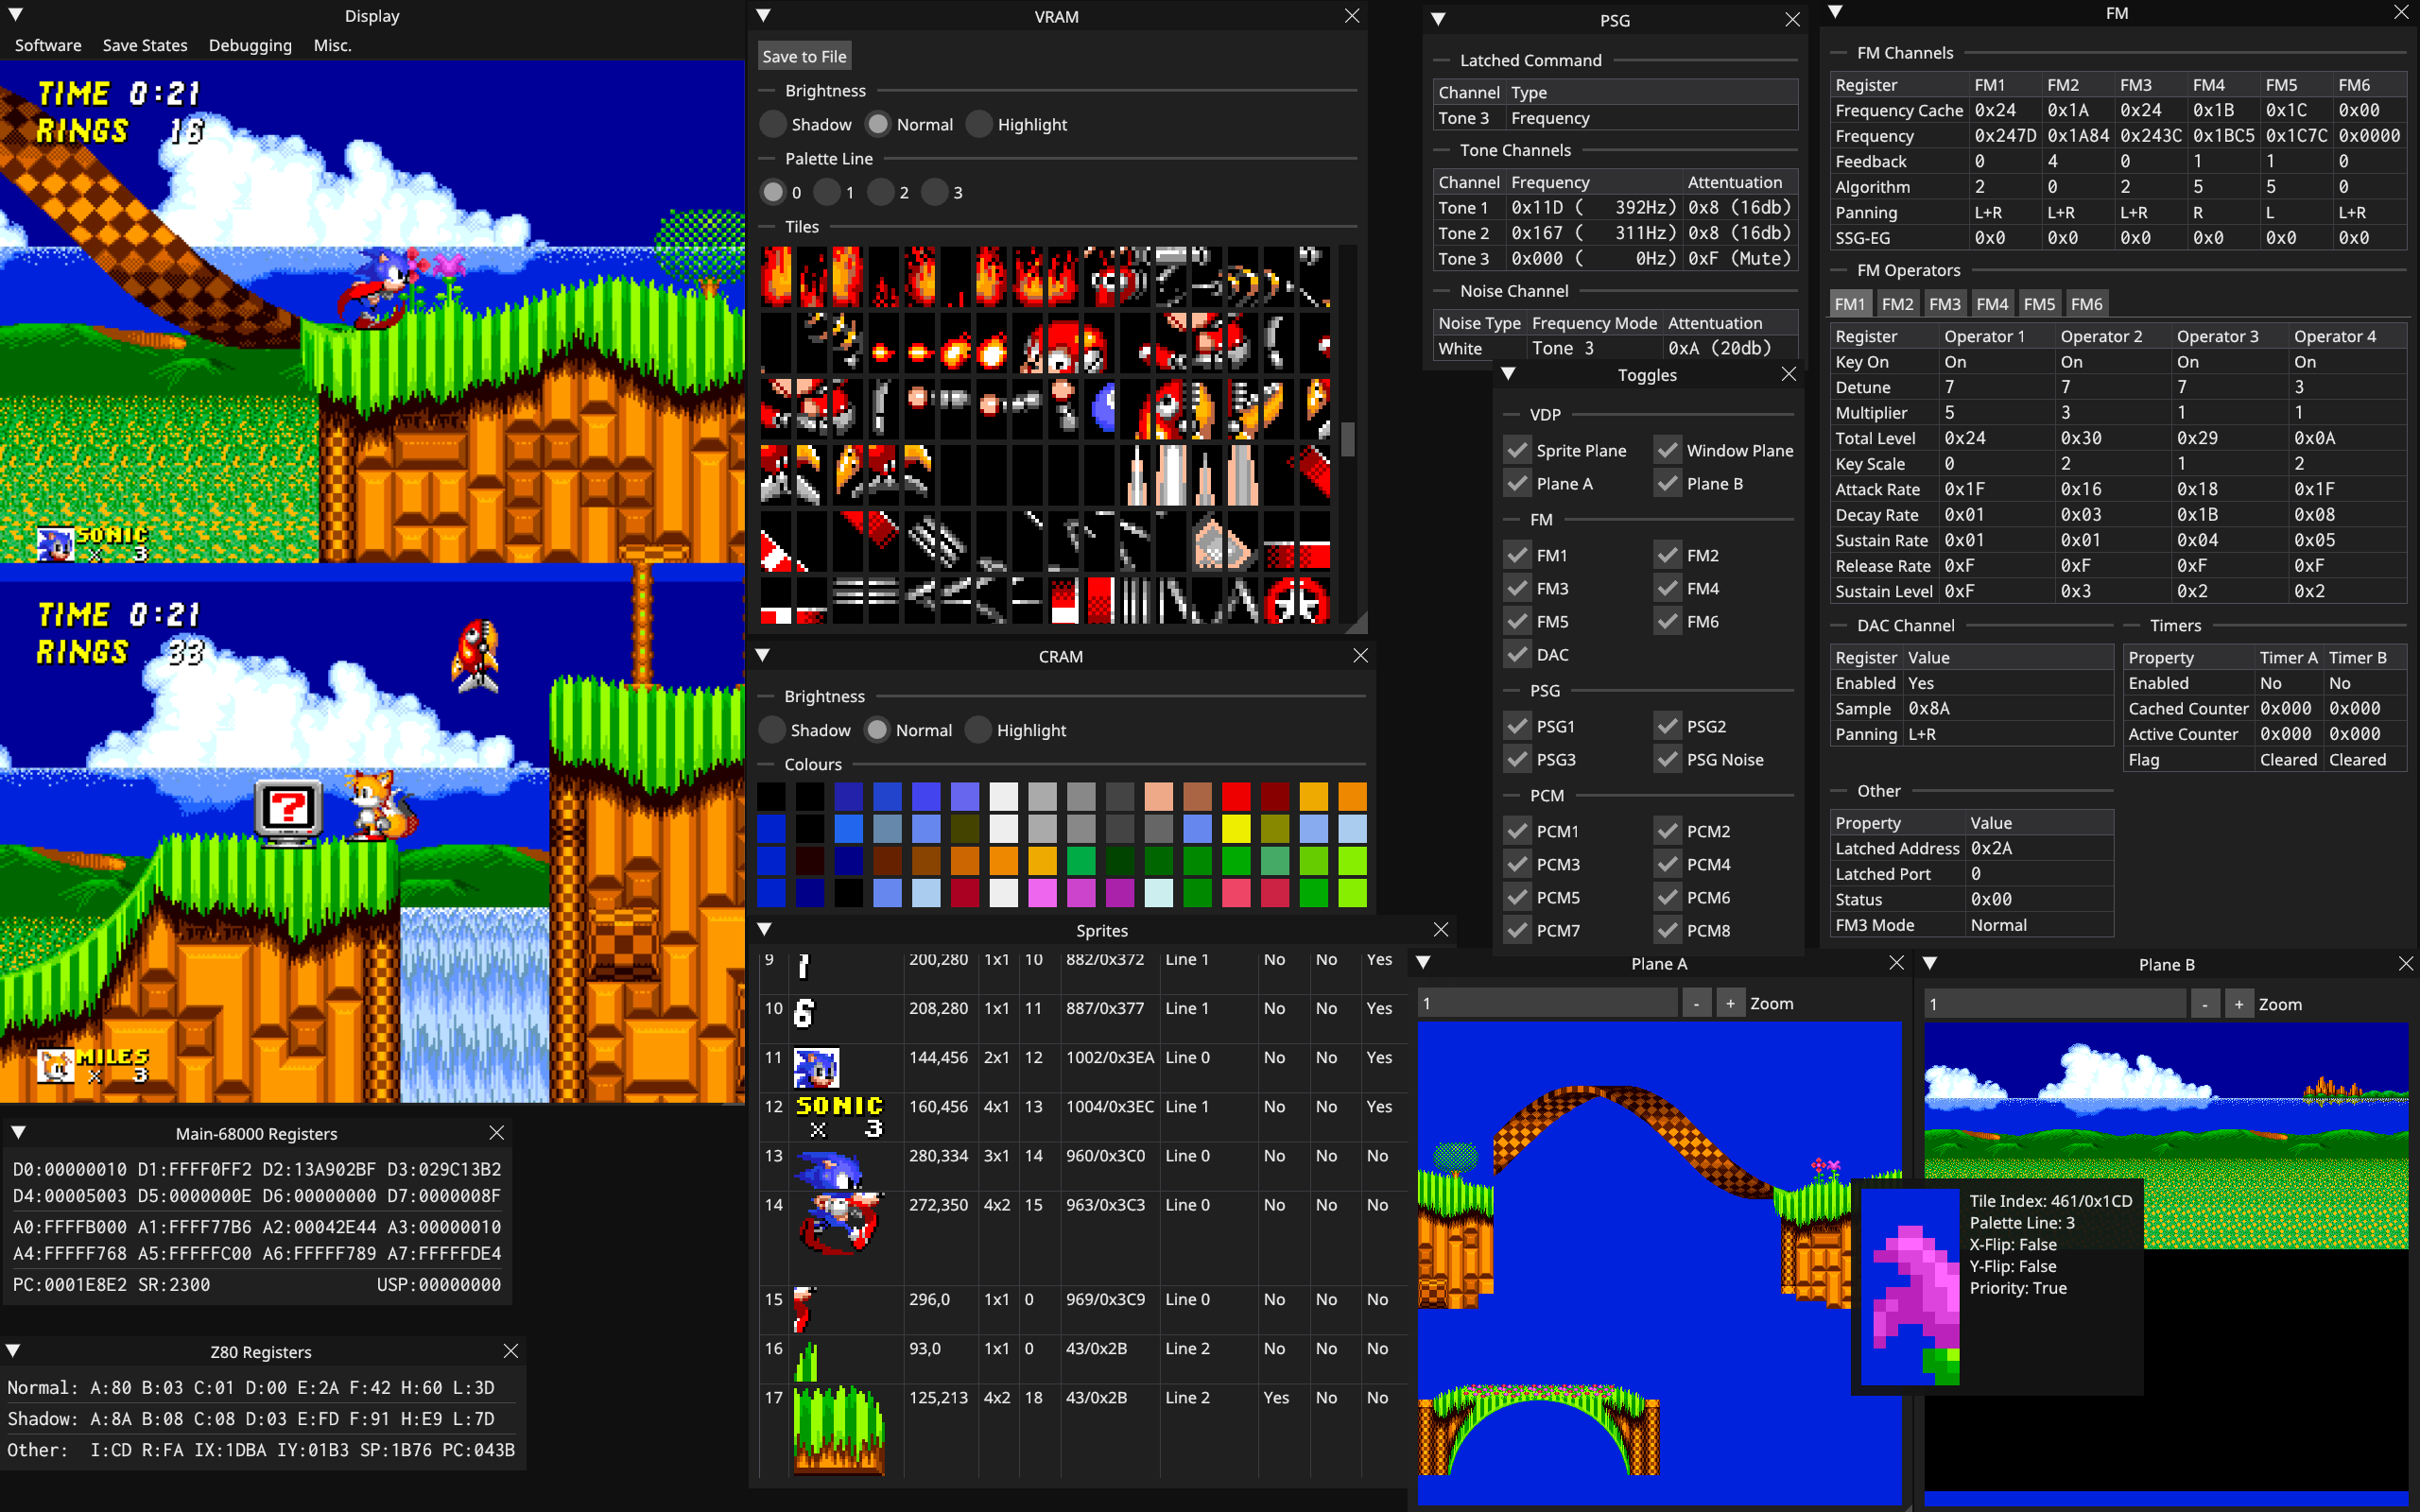
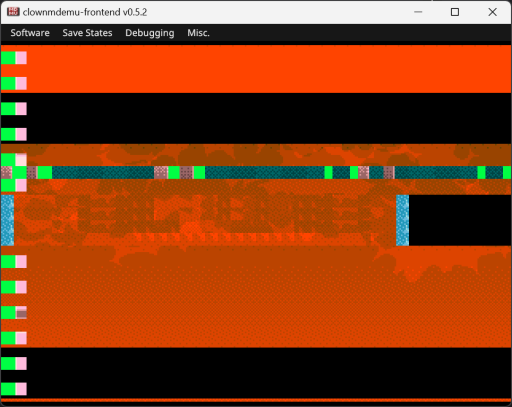
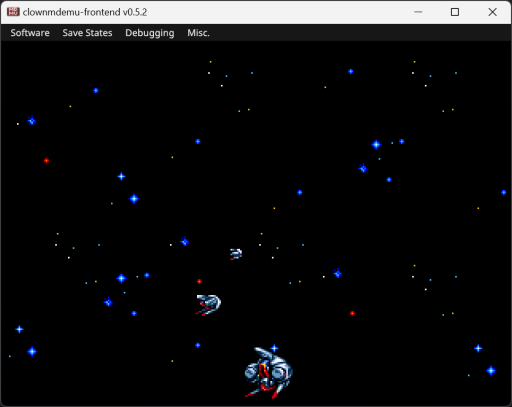
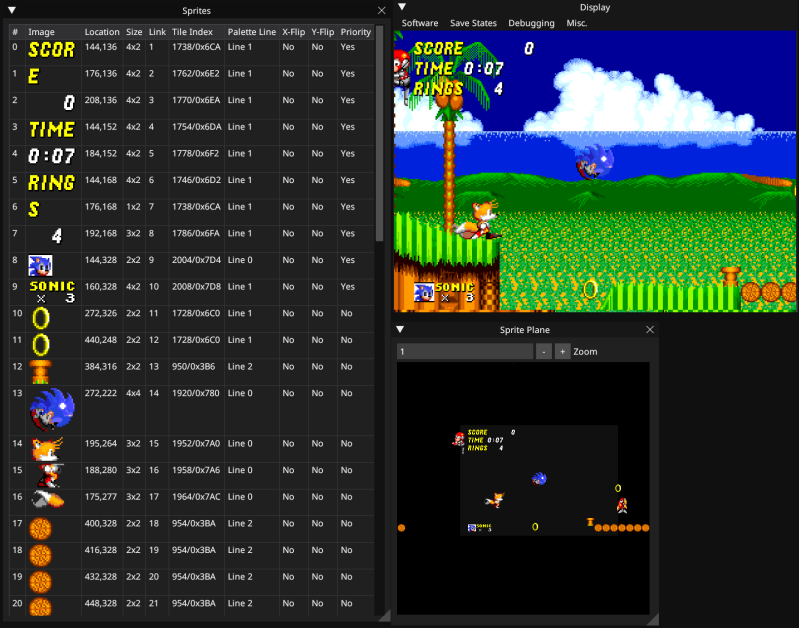
screenshot-debug.png


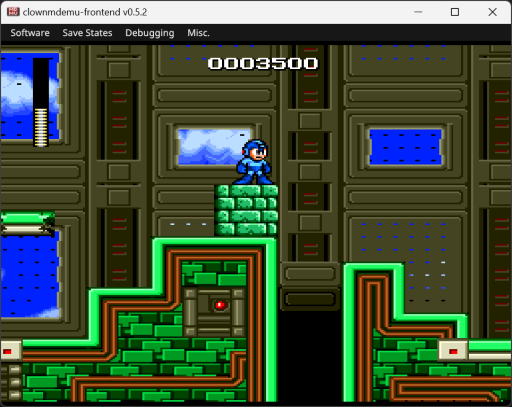
I haven't done a whole lot of testing with this, but it does appear to work with Sonic 1, 2, 3, & Knuckles, Puyo Puyo, and ROM-hacks like Sonic 2 Recreation. Sonic 3 is a little glitchy at the moment.

The basic hardware of the Mega Drive is emulated, but not to completion: things like the YM2612's SSG-EG and LFO are missing, as well as support for the VDP's Window Plane and the 68k's instruction cycle durations. Basically, games that do run in the emulator may be missing certain effects. Other games just don't boot, like Combat Cars and Micro Machines. If you want to see exactly which features are and aren't currently emulated, there's a list here.

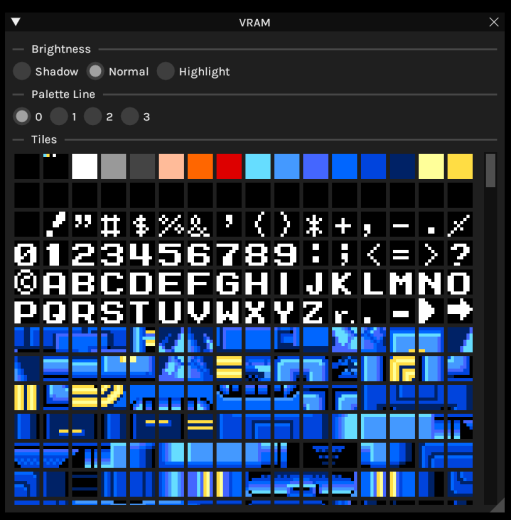
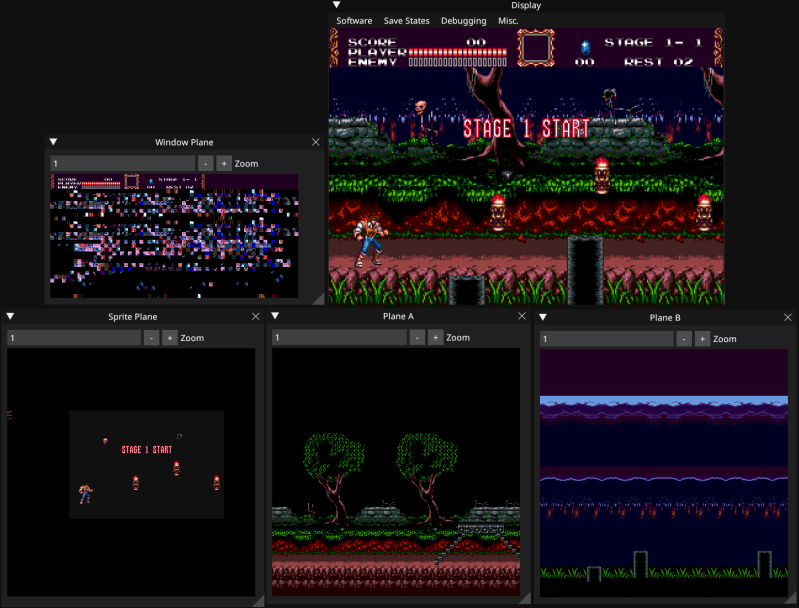
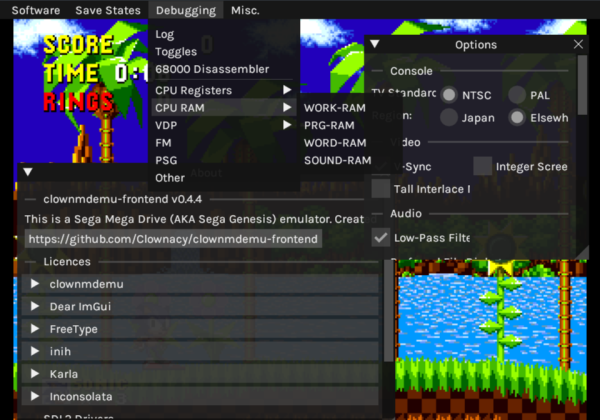
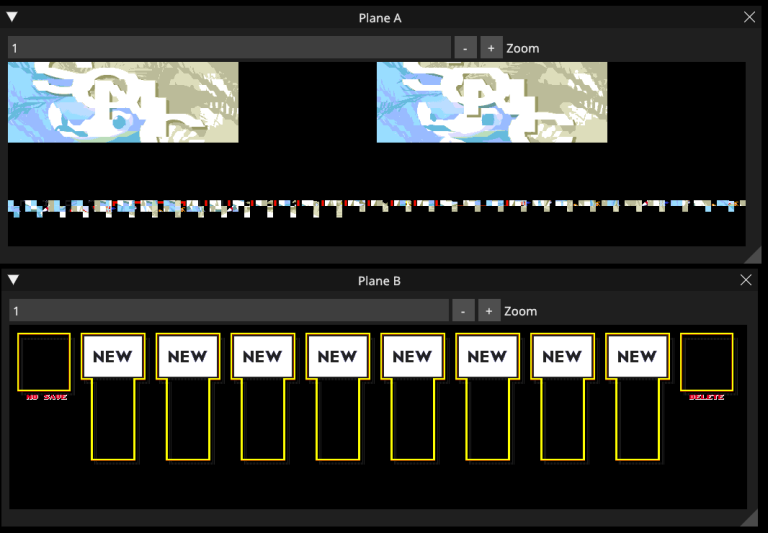
As you can see, the emulator comes with some debugging utilities. I figure that they'll come in handy for ROM-hack development, or even just finding out how a game works internally. For example, did you know that Sonic 3's Data Select menu uses Plane B for the foreground and Plane A for the background, rather than the other way around like it usually is?

Why
I've been programming for the Mega Drive since late 2012. That's almost 10 years ago! I know practically everything there is to know about how games use the Mega Drive hardware, which means that I know everything that would have to be done in order to run those games on other platforms.

I figured that writing an emulator would be a good way to put that knowledge to the test.

Code
Unlike some other Mega Drive emulators, this one has been created entirely from scratch: no MAME or Gens code here! In fact, I think that the codebase is what makes this emulator unique: it's written in...
  • Rust?
    • No, that's gross and bad and you should be ashamed of yourself for suggesting it. >:‎((((
  • C++20?
    • Not that overcomplicated thing!
  • Go? JavaScript? D? Python? Swift?
    • Get out of my thread.
  • C89...?
    • That's the one!
...You might be thinking 'Hey, that's not unique at all!', but here's the thing: my emulator is written in portable C89. What's the difference? Well, many other C projects make mistakes like using fixed-size integer types such as 'uint32_t' for no reason whatsoever (they aren't even guaranteed by the C standard to exist, breaking compatibility with platforms where they don't), treating 'int' like it's always a 32-bit type (breaking compatibility with platforms where 'int' isn't 32-bit), and using logic that only works on little-endian architectures (breaking compatibility with platforms with big-endian CPUs). These projects will only work on certain platforms, while my emulator should theoretically run on any platform that you can compile C for, so long as the RAM requirements are met. Additionally, being written in strict C89 means that the emulator can be built with vintage compilers for ancient platforms (16-bit DOS port, anyone?).

Another novel feature is that the emulator is separated into two components: the core and the frontend. The core contains all of the emulation logic, while the frontend contains all of the platform-dependent code for reading input and presenting the video and audio to the user. I intend to eventually leverage this to create a libretro core.

Another major feature of the emulator's code is that it avoids global state: all of the emulator's subsystems access their state through a struct pointer which is passed as a parameter to every function. This is essentially 'proto-C++' object-oriented C. On top of allowing multiple states to be used (thus theoretically allowing multiple Mega Drives to be emulated at once), this also makes for incredibly efficient rewind support. In fact, both rewinding and save states are entirely features of the frontend, as they have been abstracted away from the emulation core itself completely.

You can read more about the quirks of ClownMDEmu's code in its README.

Goal
My goal with ClownMDEmu is not to create the most accurate Mega Drive emulator, nor is it to create the fastest. Rather, mine aims for an in-between: to make an emulator that produces 'correct' behaviour externally while being as efficient as possible internally. External accuracy: yes - internal accuracy: no. An example of this is how the FM and PSG are updated: rather than do so once every clock tick as a real Mega Drive would, the emulator only updates the FM and PSG when the 68k or Z80 attempt to access them, doing so in bulk until they have 'caught up' with the rest of the system.

Download
But what's the use in describing the emulator here? You can try it for yourself:
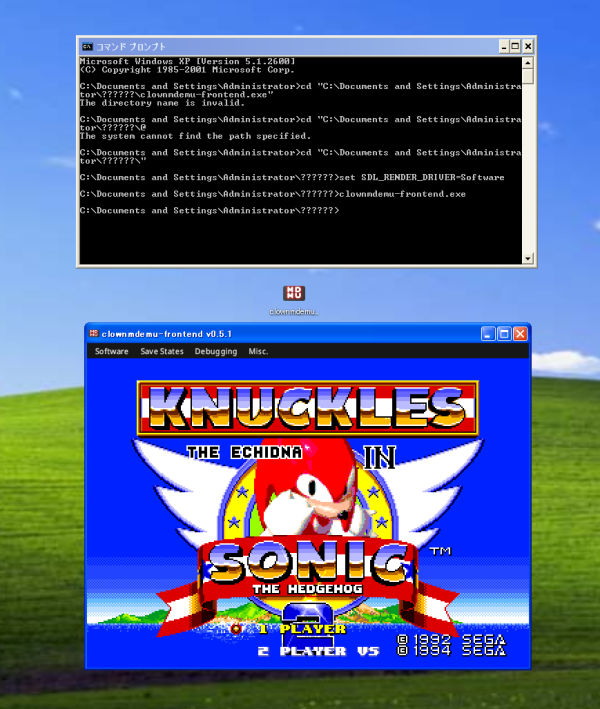
The EXE is 32-bit, and should work on versions of Windows as far back as Windows XP. An x86-64 AppImage is provided for Linux.

If you're compiling it yourself on Linux, then that should be simple enough: the build script is CMake, and the standalone frontend depends on the FreeType and SDL2 libraries. You can find the latest source code here:
Usage
Keyboard controls are remappable, but the controller layout is currently hardcoded. You can find a list of default controls in the emulator's README. Notably, you can quick-save with F5, quick-load with F9, fast-forward with the space key, and rewind with the R key.

Development
Since starting this emulator, I've been documenting its development on my blog. So far there have been 8 posts, which I'll list here:
I'll try to cross-post future posts here, so that anyone who's interested in this emulator can stay up-to-date with its development.
 
Last edited:
[Cross-post from my groovy blog ;)]

It's been too long, but finally my emulator has an update!

Since the first release, the emulator has been greatly optimised, some inaccuracies in the 68000 interpreter have been addressed, and the occasional missing CPU instruction has been added. Compatibility with games should be a bit better than before, but still not great as many essential features of the Mega Drive are not emulated.

The standalone frontend has had some extra debug menus added, which allow you to view the registers of the YM2612, 68000, and Z80:

image.png


New to the emulator is a libretro core frontend, allowing the emulator to be used by libretro implementations such as RetroArch. It lacks the debug menus of the standalone frontend, but makes up for it with features that libretro cores get for free, like customisable controllers and shaders:

image-2.png


In theory, the libretro core should provide a simple way of getting this emulator running on a variety of platforms: just compile the core into a library (static or shared), and use it in tandem with a libretro frontend such as RetroArch.

During the development of this update, I have set up a test suite for the 68000 interpreter which allows me to check that each instruction does as it is supposed to. It was this test suite that notified me of how the word-size ADDA, SUBA, and CMPA instructions were pitifully broken. I'm surprised that this didn't break Sonic 1, 2, or 3&K, but it did break Linux.

Yes, Linux: to test my 68000 interpreter, I extracted it from this emulator and used it to create an emulator for the 68 Katy, a hand-built computer that runs Linux. You can read more about it here.

I also made a small benchmarking tool which measures the speed of the core emulation logic. This is useful for measuring the impact of optimisations and the difference in speed between platforms.

Overall, this has been a rather incremental update. Rather than being focussed on optimisation and refactoring, I hope that the next update will be focussed on improving compatibility and emulating more features of the Mega Drive.

You can download the standalone frontend here, and the libretro frontend here.
 
Last edited:
[Cross-posted from my blog.]

Keyboard Rebinding

One shortcoming of the standalone frontend is that it lacks keyboard rebinding: the W, A, S, and D keys will always control the Control Pad's D-Pad, and so on.

But not anymore!

image-7.png


New to the frontend is full keyboard rebinding! In addition, the default key bindings have been switched to the more common arrow keys and Z/X/C keys combination.

Unlike some other emulators, this system allows the user to bind multiple keys to the same action: for instance, if the user wanted to bind both the 'Z' key and the 'space' key to the Control Pad's 'A' button, then they can do so!

It would be pretty frustrating for binding customisations to be lost whenever the program is closed, so support has been added for persistent configuration: settings are saved to a file called 'clownmdemu-frontend.ini', allowing settings such as the keyboard bindings, console region, and V-sync to be remembered by the emulator.

Options Menu

Previously, the options would all be managed through the menu bar, but this is quite clunky as the menu bar would close after each option is toggled. To improve the user experience, the options have now been moved to a dedicated menu:

image-8.png


This menu provides a much more intuitive way to change options! Additionally, each option shows a tooltip when hovered over with the mouse, allowing unfamiliar users to understand what they do!

image-9.png


Default Window Sizes

Another improvement to the user experience is that windows are now given a sane default size, meaning that they will now have a proper size when opened for the first time.

image-10.png

This is dumb.

image-11.png

Much better.

Recent Software

Opening the same ROM file over and over again is tedious, so now the emulator keeps a list of the 10 most recent files used:

image-12.png


FM and PSG Debugging Toggles

The standalone frontend has had the ability to disable individual VDP planes for ages, but now it can also toggle FM and PSG channels. A dedicated menu has been added for this:


This feature is also available in the libretro core:

image-15.png


PSG Debugger Overhaul

The PSG debugging menu was butt-ugly before, and has been given a makeover:

Before:
image-14.png


After:
image-13.png


Support for Alternate PAL Detection Method

Previously, when playing Sonic the Hedgehog 2 with the emulated Mega Drive in PAL mode, the music would play at slightly slower speed, just like it does in the first game. This shouldn't happen.

The reason that this was occurring was that the game relies on an alternative method of detecting the PAL video mode: by checking bit 0 of the VDP's control port. This bit should reflect whether PAL mode is enabled or not. Now that this is the case, the game properly detects and accounts for the speed difference in its music, allowing it to play at the proper speed.

Download
v0.3 of the standalone frontend can be downloaded here: https://github.com/Clownacy/clownmdemu-frontend/releases/tag/v0.3

v0.1.1 of the libretro core can be downloaded here: https://github.com/Clownacy/clownmdemu-libretro/releases/tag/v0.1.1
 
[Cross-post from my blog.]

This is just a quick update to address some issues in the previous v0.3 release.

Make FM Debugger More Compact

The FM debugger was a bit ‘verbose’ in v0.3…

image.png


As you can see, each channel was given its own window, which meant that it was a lot of effort to simply switch from one channel to another without just having all windows open at the same time, which would take up a lot of the screen.

Since it's unlikely that a user would ever need to see more than one FM channel's registers at a time, these windows have all been merged into a single tabbed window:

image-16.png


Fix DPI Support

Unfortunately, after hyping it up so much in v0.3's release, the default window sizes were broken on DPIs that weren't 150% the standard. I was expecting Dear ImGui to handle DPI differences like this automatically like it usually does, but that's not the case here.

I'll have to remember to test this frontend at alternate DPIs before each release to prevent a repeat of this mistake.

Add a Horizontal Scrollbar to the Plane Debugger

As the result of yet another strange quirk of Dear ImGui, horizontal scrollbars do not exist by default, even in windows that need them. This affected the VDP's Plane A/B debuggers, which only had a vertical scrollbar. By explicitly telling Dear ImGui to create a horizontal scrollbar, this issue is no more:

image-17.png


User-Friendliness Improvements to Keyboard Rebinding

Sometimes it's the small things that matter most.

When the user is repeatedly adding key bindings, the newly-extended binding list would push the 'Add Binding' button off-screen, requiring the user to scroll down to be able to press it again. This is a small annoyance, but an annoyance nonetheless, so it has been corrected by automatically scrolling the window down after a new binding is added.

Additionally, when selecting an action to bind to a selected key, the selected key is displayed to the user. This extra feedback allows the user to verify that they selected the correct key, instead of them being left in the dark.

image-18.png


Fix Phantom Keyboard Inputs After Rebinding

Sometimes, after rebinding the keyboard inputs, the emulated Control Pad would behave as if certain buttons were held when they are not. This was due to edge-cases in how the key-binding system works. For instance, if a key's binding were changed after it has been pressed but before it is released, then the emulator would 'forget' which Control Pad button to release when the key is released. This should no longer be the case.

Fix Ugly Seams Around Tiles in VRAM Debugger

Depending on the display's DPI, odd artifacts could appear around the tiles in the VRAM viewer:

image-20.png


This was the result of some accidental fractional image scaling. This has been corrected to use the proper integer image scaling, eliminating the seams.

Closing

With this much-needed polishing complete, hopefully the next update will include some improvements to the core emulation: Window Plane, SRAM, LFO, SSG-EG, YM2612 Timers - there are plenty of things left to add.

Download here: https://github.com/Clownacy/clownmdemu-frontend/releases/tag/v0.3.1
 
Last edited:
frontend v0.4.2 & libretro v0.2.2
This update's on the smaller side: it's mainly just for native file dialogs on Unix-like OSs.

The emulator itself has been lightly optimised, as I've started using my 3DS as an ultra-low-end benchmark. Hopefully I can make my emulator fast enough to run at full speed on the 3DS someday.

I've also fixed the bug where, if you play Sonic 1, pause, and then reset the emulator, the Sega chant won't be audible. The fix was to make the YM2612 reset when the Z80 is reset, which is what happens on a real Mega Drive.

The main reason for this update is that the standalone frontend on Linux and the BSDs now has native file dialogs, instead of relying on the barebones fallback that was added in v0.4. These particular file dialogs leverage Zenity, meaning that they're GTK-based. In the future, I'll also add support for kdialog, to provide a Qt-based alternative. The usage of Zenity means that there is no hard dependency on GTK: if Zenity is not installed, then the frontend will harmlessly fall-back on the barebones file dialog instead.

Standalone: https://github.com/Clownacy/clownmdemu-frontend/releases/tag/v0.4.2
libretro: https://github.com/Clownacy/clownmdemu-libretro/releases/tag/v0.2.2
 
Last edited:
frontend v0.4.3 & libretro v0.2.3
Another small update:

The plane debugger was broken back in v0.4. Thanks to Brainulator pointing this out, it has been fixed in this update.

A new Qt-based file dialog has been added for Linux and the BSDs, which leverages the 'kdialog' tool. Like the Zenity-powered GTK file dialog, this is a soft dependency: it is not required to build or run the emulator, and the emulator will instead fall-back on the default Dear ImGui-based dialog if neither are available.

I've also attempted to fix a curious hang that would occur when resuming the PC after leaving it asleep overnight. From what I can tell, it's the result of an overflow in the millisecond tick counter. To avoid this, the tick counter has been made 64-bit. Now it will only overflow after 2,000,000 years.

An optimisation has been made to the Z80 interpreter which gives it a massive speed boost, improving the performance of the emulator overall. It's still not enough to get the emulator running at full-speed on the 3DS, but it's a big step towards it.

Standalone: https://github.com/Clownacy/clownmdemu-frontend/releases/tag/v0.4.3
libretro: https://github.com/Clownacy/clownmdemu-libretro/releases/tag/v0.2.3
 
nice emulator, I wonder if people are gonna start using it over blastem or any other emu.
 
Last edited:
frontend v0.4.4
Another small update that mainly fixes bugs in the frontend, with one bugfix in the emulator itself.

The emulator also got a logo and icon at long last:
logo.png

It's meant to mimic the look of Windows 11's icons, like those of Notepad and Calculator.

Support for Linux and macOS has been fixed: SDL2's unreliable DPI detection was throwing the scaling off. Unfortunately, this means that high-DPI support is currently Windows-only. I blame SDL2 for this one: its entire purpose is to be a platform abstraction layer, and it completely fails at this when it comes to managing DPI scaling.

I also fixed the barebones 'save file' dialog, which has been broken since I first added it. Whoops. Now macOS users can save things properly.

Games that are dropped onto the emulator window are now added to the 'Recent Software' list.

Alt+Enter will now toggle full-screen. This is a fairly standard keyboard shortcut, so it may come more naturally than the default F11 key binding.

Various instances of stuck inputs have been fixed. No more infinite rewinding!

Finally, there's the emulator bugfix: sprites were being culled while they were still on-screen by one column of pixels at the right side of the screen. At first I mistook this for a bug in Sonic 2, which led me on a wild goose chase.

https://github.com/Clownacy/clownmdemu-frontend/releases/tag/v0.4.4
 
[Blog post]

I've been thinking of expanding my Mega Drive emulator with support for the Mega Drive's add-on - the Mega CD. On paper, this should be simple enough to do: while the Mega CD adds a second 68000 CPU, communications ports, a lot of extra RAM, hardware for graphics-transformation, a sound chip, the titular CD drive, and a BIOS to manage it all, many of these can be skipped or implemented in a quick and easy way to at least get some games booting.

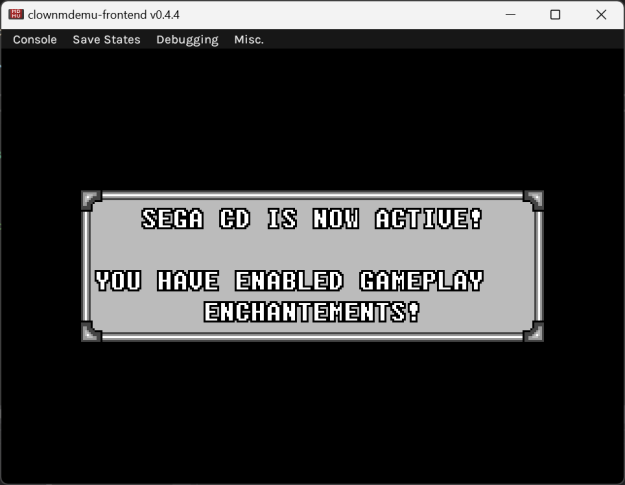
As of writing, I have achieved my first milestone, which is to get a couple of Sonic hacks to boot. These hacks are special because they make minimal use of the Mega CD hardware, making them the easiest software to add support for. One hack (Sonic Winter Adventures) can be seen below, declaring its detection and usage of the Mega CD:

image.png


Sonic Winter Adventures exclusively uses the Mega CD for playing music from a CD. The other hack, my old Super Sonic & Hyper Sonic in Sonic 1 hack, uses the Mega CD for playing PCM samples using the extra sound chip.

Unlike typical Mega CD games, these two hacks store their data on a cartridge instead of a CD. This bypasses the need for me to implement the Mega CD's boot-up process of reading the IP and SP binaries from the disc, and also the need to implement the various BIOS calls that are related to reading CD sectors.

Games that utilise the Mega CD hardware, but run from a cartridge, are called 'Mode 1' games. This is because of Sega's official Mega CD developer documents, which dub the cartridge-booting process 'Mode 1' and the CD-booting process 'Mode 2'.

Out of all of the Mega CD's hardware, the only things that these hacks rely on are the extra CPU, the communication ports, the extra RAM (and the bus logic that allows it to be accessed), the BIOS, and, in my Super Sonic hack's case, the extra sound chip. The sound chip and most of the BIOS can be stubbed-out to at least get the hacks to boot, leaving only the extra CPU, communication ports, RAM, bus logic, and some parts of the BIOS.

The screenshot seen above is the result of implementing these essential features. So, how did I do it?

The CPU (dubbed the 'SUB-CPU') is a 68000, just like the Mega Drive's main CPU (appropriately dubbed the 'MAIN-CPU'). Because of the modular design of my emulator's internals, the 68000 interpreter supports multiple states, allowing it to emulate two CPUs simultaneously. I just had to allocate a second state struct for this second CPU, and then add an additional call loop to invoke the interpreter using this struct for the duration of the emulated frame.

However, for this CPU to do much of anything, it needs some RAM. The Mega CD adds two sets of memory: WORD-RAM and PRG-RAM. PRG-RAM essentially belongs to the sub-CPU, and is intended to hold its BIOS and other code. WORD-RAM is shared between the main-CPU and the sub-CPU, typically being used to ferry data between the Mega CD's CD drive or graphics-transformation hardware and the Mega Drive. Because PRG-RAM is 'owned' by the sub-CPU, the main-CPU must request the sub-CPU's bus to be able to access PRG-RAM. This freezes the sub-CPU. This is not the case for WORD-RAM, which can be exchanged between the two CPUs freely without freezing either of them. WORD-RAM and PRG-RAM are massive: the Mega Drive has 64 KiB of RAM, while WORD-RAM and PRG-RAM add a further 768 KiB. Implementing this all is just a matter of adding the appropriate logic to the sub-CPU's bus event call-backs, accessing an array that represents either WORD-RAM or PRG-RAM based on the specified address, just like a real bus.

To allow the two 68000 CPUs to communicate, a couple of words are made available to both CPUs. Half of the words can be read and written by the main-CPU, but are read-only for the sub-CPU, and the other half are the other way around. No bus-requesting or exchanging is needed to access these.

That leaves the final part of the puzzle: to manage the complicated CD drive hardware (among other things), the Mega CD comes equipped with an elaborate BIOS. Notably, this BIOS features system calls for reading sectors from the CD and playing CDDA music. Software that runs on the sub-CPU is intended to be managed by this BIOS, meaning that a partial BIOS implementation is needed for the sub-CPU programs of these ROM-hacks to run at all. Without the sub-CPU program running, Sonic Winter Adventures will refuse to boot, as it will infinitely wait for a response from the sub-CPU to be sent through the communication ports.

Sub-CPU programs are loaded at address 0x6000 and come with a small header. This header features a magic number (string), a flag, and a couple of offset tables. One offset table specifies functions that will be called by the BIOS on start-up, after start-up, every vertical interrupt, and in response to a user-raised event. Without a functional BIOS, these functions will never be called.

An additional requirement for the BIOS is exclusive to Mode 1 games: because these games boot directly from a cartridge rather than the Mega CD's BIOS, the sub-CPU's portion of the BIOS is not automatically loaded, and instead must be loaded manually. The typical method for doing this is to locate a magic number, then decompress a nearby Kosinski-compressed payload which contains the sub-CPU BIOS. For these games to correctly boot in my emulator, this magic number needs to be present, and a dummy Kosinski-compressed archive needs to be at the expected location. Without the magic number, the hack may not think that a Mega CD is attached at all, and, without the the Kosinski-compressed archive, the hack would crash as the decompressor would go haywire.

To meet these various needs, I created my own stub BIOS in 68000 assembly, compressed it in the Kosinski format, and had the sub-CPU's bus logic place it at the same location as the original BIOS's payload. This way, the hacks' Mode 1 initialisation logic and sub-CPU programs all run correctly.

With this done, Sonic Winter Adventures is able to detect the Mega CD, request the sub-CPU's bus, decompress the sub-CPU BIOS into PRG-RAM, release the sub-CPU's bus, reset the sub-CPU, run the sub-CPU program, and finally communicate with the sub-CPU program to complete its boot process, resulting in the above screenshot. It's not much, but it's a start!
 
Last edited:
[Blog post]

If you've been keeping up with the development of my Mega Drive emulator, you'll know that I've recently been trying to add support for the console's addon - the Mega CD. Last time, I was able to get a cartridge-based Sonic ROM-hack to boot. This hack made fairly-minimal use of the Mega CD, making it easy to at least get to boot. Now, I've reached the next milestone by getting an actual commercial Mega CD game to boot! That game, of course, being Sonic CD!

The most immediate hurdle to getting a proper Mega CD game to boot is the CD itself: my emulator was designed around reading data from a cartridge dump, so I had to add an entire new mechanism for fetching data from a CD image. While a cartridge is 'flat mapped' into the 68000's memory, allowing the CPU to see and access all of its data at once (like an array), a CD must have its data copied into a RAM buffer before the 68000 can read it. The CD is far larger than the Mega CD's RAM (700MiB vs 768KiB), so only small portions of the disc's data can be loaded at once. Data is read from the disc by making various calls to the console's BIOS.

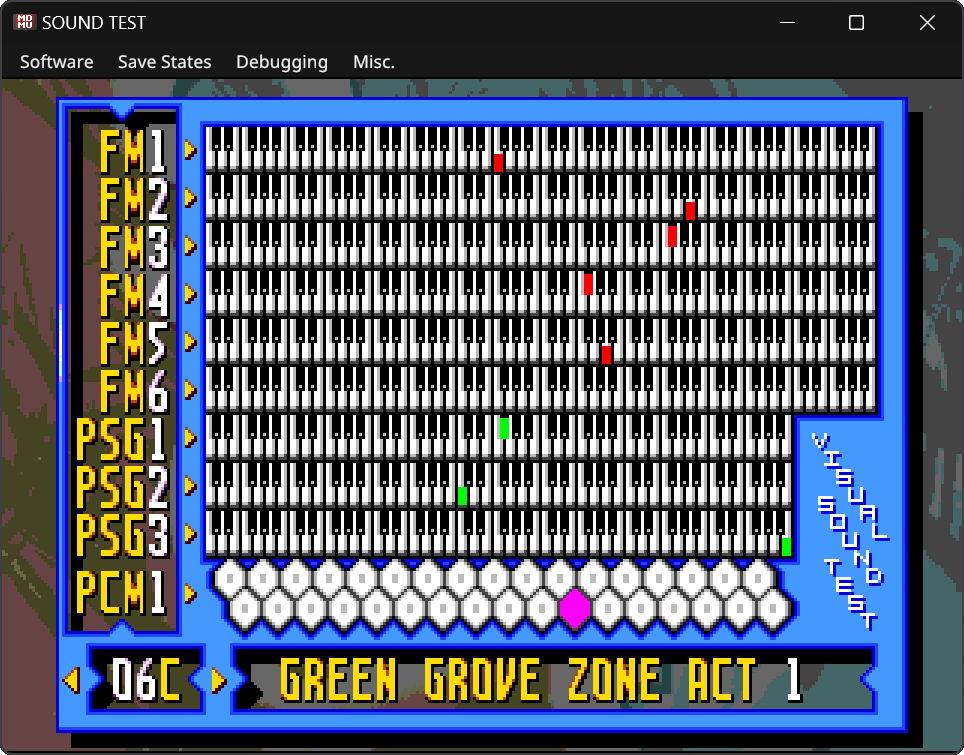
To test my emulator's ability to emulate said BIOS calls and correctly read data from a CD dump, I created my own Mega CD port of my Visual Sound Test homebrew. In the process of making this port, I learned about the Mega CD's start-up process, as well as which combination of BIOS calls is required to load data from the CD. In a day or two, I had a port that would run in Genesis Plus GX (another emulator that supports the Mega CD), and I began expanding my emulator to be able to run it.

This led to the second obstacle which needed to be overcome: the Mega CD's boot process.

The Mega Drive's boot process is incredibly simple: in the first 0x100 bytes of the ROM is a 'vector table', which is a standard data structure that the 68000 uses to initialise itself: it initialises the stack pointer and tells the 68000 where to begin executing code. Once the 68000 begins executing code, the game's code can go about initialising the rest of the Mega Drive hardware and begin playing the game.

The Mega CD's boot process is far more complicated: there is a small header at the very start of the CD's data which details the location and size of two blobs of code: the Initial Program (IP) and System Program (SP). The IP is loaded into the Mega Drive's WORK-RAM, to be executed by the Mega Drive's CPU, while the SP is loaded into the Mega CD's PRG-RAM, to be executed by the Mega CD's CPU. The SP has a header that contains offsets to various call-backs: one for initialisation, one for the 'main' function, and one for the vertical interrupt (V-Int).

The way the CD header works is oddly complicated, having fields that either do nothing or do not function in the way that you would expect. The data from this header is read by the Mega CD's BIOS, which it then uses to load the CD sectors that contain the IP and SP blobs into their respective parts of memory. The SP header is parsed in order to install the proper call-backs, which the BIOS then proceeds to call. The IP and SP programs both run, taking over from the BIOS and running the game. It's extremely unlikely that an entire game can be fit in the IP and SP blobs, so instead these often act as a 'chain-loader', communicating with the BIOS to load more sectors from the CD which contain more code and data. Sonic CD in particular has files on its CD that are called 'IPX' and 'SPX', which contain code that is responsible for loading and running the actual game.

To handle all of this complicated initialisation logic, the Mega CD relies on its BIOS. However, my emulator does not use the Mega CD's BIOS, instead favouring the 'High-Level Emulation' approach. Because of this, my emulator can't simply run the BIOS - it has to be the BIOS, doing all of its tasks in its absence. This is comparable to playing Sonic 1, not by emulating the Mega Drive, but by just making your own Sonic 1 from scratch. Because of this, my emulator has to manually perform the entire Mega CD boot process itself, reading the first CD sector, parsing the header, loading the IP and SP programs, parsing the SP's header, and finally running them.

My Visual Sound Test port's IP will colour the screen red to show that it is running. If the SP is also running, then the IP will detect it and colour the screen green. After that, the SP will load the Visual Sound Test as one big binary blob into WORD-RAM, pass WORD-RAM to the MAIN-CPU, and IP will jump into it, completing the initialisation process and running the Visual Sound Test.

With proper implementation of the boot process, the IP and SP were working together to colour the screen green. One thing was stopping the Visual Sound Test from running: the lack of BIOS calls.

As said before, games load data from the CD by calling the BIOS. The BIOS is given a value that denotes an operation to be performed, and the BIOS does it. Without an actual BIOS, my emulator has to fill its role, receiving these values and performing the task that the BIOS would have done in response. This is fairly simple to do: to run a BIOS call, the SUB-CPU jumps to address 0x5F22, causing the 68000 to read a word of machine code from address 0x5F22. By detecting reads from address 0x5F22 in my 68000 emulator's bus event call-back, I can perform the requested BIOS task and then return the machine code of an 'rts' (return) instruction to the 68000, causing it to exit the BIOS call and resume the game code.

By analysing Sega's official BIOS documentation, sample code provided with the so-called 'DDK' (an SDK from the 90s), and disassemblies of Sonic CD and the Mega CD BIOS, I was able to implement rough approximations of several BIOS calls related to reading the CD. With this done, my Visual Sound Test homebrew was able to boot and run perfectly!

image.png&w=625

(This is an old screenshot, so just pretend that this is running in my emulator and that it's the Mega CD port.)

There was one small issue that's worth mentioning here: Mega CD games are required to insert some "security code" (a Sega logo splash screen) at the start of their IP. For whatever reason, this code would crash in my emulator, so I made my emulator simply skip it for now. This code is not essential in any way, to my knowledge.

With my ported homebrew booting, I moved onto finally getting Sonic CD to boot! There was much debugging, as various mistakes in my emulator were causing the boot process to fail very early on, but eventually files were finally being properly chain-loaded: from IP to IPX to MDINIT to BURAMINIT... which would indefinitely hang.

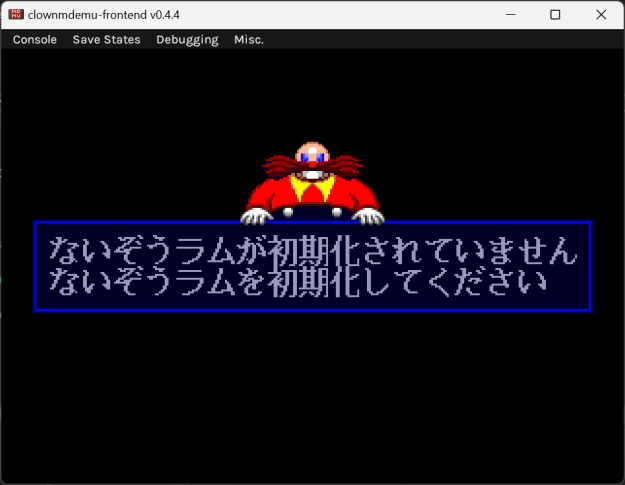
BURAM (Back-Up RAM) is where save data is stored. BURAM has its own series of related BIOS calls which needed implementing (notably, they use address 0x5F16 instead of 0x5F22), but upon stubbing these out (all returning an error code), I was greeted by this:

image-1.png&w=625


Finally, a sign of life from Sonic CD! I don't know a lick of Japanese, but I assume that this is an error screen of some sort. It won't let you proceed past it, so I made some of the BURAM BIOS calls pretend to run successfully to bypass it. Unfortunately, the game would freeze between this stage of initialisation and running the title screen. This was hard to debug, and had me stumped for a few days. Confused and demotivated, I forced myself to spend a few hours today trying to find the problem, only to discover that it was the result of an interrupt handler in my stub SUB-CPU BIOS not preserving the registers! This caused a loop that was intended to clear a data buffer to begin clearing the code buffer, including itself. Upon fixing this, I ran the emulator one more time and was blown away to see this:

image.png&w=625


Victory! Sonic CD boots! Unfortunately, it crashes when I try to start a new game, but still, this is a great milestone!

It's a strange thought that one of my emulator's first milestones was reaching the title screen of Sonic 1, and now, after all this time, the latest milestone is reaching the title screen of Sonic CD. Things sure have come a long way from this emulator being a 68000 interpreter and VDP renderer held together by a little bus logic. Soon, I hope to have Sonic running around Palmtree Panic Zone!
 
Last edited:
In the last post, I mentioned that my emulator does not use the Mega CD's BIOS program because it favours the 'High-Level Emulation' approach. In this post, I'll go over what that means and how it will affect my emulator.

Other emulators, such as Genesis Plus GX and Kega Fusion, require that the user provide their own copy of the Mega CD's BIOS, which has to be extracted from a Mega CD. Without this, the emulator will be unable to play Mega CD games. I cannot bundle this BIOS with my emulator because of copyright limitations (Sega owns the BIOS and I don't have the legal right to distribute it). However, expecting the user to provide their own copy of the BIOS is not an acceptable solution to me, as it creates busywork for the user: good software should be as easy to use as possible, and expecting the user to buy a Mega CD, extract its BIOS, and then configure the emulator to use it, is the furthest thing from easy. Likewise, expecting the user to download the BIOS from some random website is also unnecessary busywork (though, legal or not, a person certainly has a moral right to download software that they already own a physical copy of).

This means that the most user-friendly option is to forgo requiring the original BIOS entirely. This leaves me with two options: make my own open-source BIOS, or make my emulator not need a BIOS at all.

Making my own BIOS should not require much explanation: I just have to create my own BIOS that implements the same API. If I am able to do so without copying any copyrighted material (code, graphics, or sound) from the original BIOS, then my BIOS will legally be my property, and I can freely distribute it with my emulator.

Making my emulator not require a BIOS at all is a bit more complicated: typically, an emulator recreates the behaviour of a console's hardware, and then runs the console's software on top of it. This is known as Low-Level Emulation (LLE), because the 'lower layer' (the hardware) is the part that is being recreated by the emulator. However, it is possible for an emulator to instead recreate the 'higher layer' (the software), performing what is called High-Level Emulation (HLE). This is how an emulator can be made to not require a BIOS: instead of recreating the behaviour of the underlying hardware, and then running the original BIOS, which interacts with said hardware, the emulator can instead recreate the behaviour of the BIOS itself, making the original BIOS (as well as its underlying hardware) redundant.

There are various trade-offs between using the original BIOS, making my own BIOS, and making my emulator not need a BIOS:

Using the original BIOS is the most accurate solution, as it is the same software that is used by a real Mega CD. This means that all of the behaviours and bugs will be the same. However, the original BIOS is burdened by copyright issues, making it the most awkward option for the user. In addition, it is an awkward solution for me, the emulator developer, as I have to make my emulator emulate parts of the Mega CD hardware that are used by the BIOS. This includes the CDC, CDD, and BuRAM. The final downside of this approach is that the BIOS remains a 'black box' - obscure, obfuscated software. This makes it difficult for the user to understand what the BIOS is doing and how to make modifications to it. If a person is given software, then they deserve to be able to understand and modify it as easily as is feasible, and relying on a binary blob completely undermines that.

Making my own BIOS rids the user of the difficulty of obtaining a copy of the original BIOS, but places a burden on me by requiring that I program an entire BIOS from scratch. The new BIOS may be inaccurate to the original one, differing in intended behaviour, suffering from bugs that the original did not, and missing bugs that the original had. For the new BIOS to act as a true replacement for the original, it should provide all of the same features and interact with the same underlying hardware. Because of the latter requirement, I would still have to make my emulator emulate the CDC, CDD, and BuRAM hardware, among others. On the upside, my new BIOS would be open-source, fully documented, and deobfuscated, allowing the user to understand, modify, and even distribute it with relative ease. However, I say only 'relative' ease because the BIOS would be at least partly written in Motorola 68000 assembly language, which is a fairly unknown language in today's world. The rest of the emulator is written in ANSI C, so it may be too much to expect the average person browsing the emulator's source code to comprehend the BIOS's code. One last upside of creating my own BIOS is that it could be used outside of my emulator: it could be used with other emulators, or even with a real Mega CD!

Making my emulator not need a BIOS at all also rids the user of the burden of sourcing a copy of the original BIOS, and has the same downside of having questionable accuracy. However, it bypasses the need for my emulator to emulate the CDC, CDD, and BuRAM hardware, as it is (at least mostly) encapsulated by the BIOS. No BIOS; no hardware. This is similar to how WINE doesn't need to emulate a whole PC just to run a Windows program. I think some of the CDC's registers are interacted with directly by games' SUB-CPU programs, but that shouldn't require emulating the entire CDC. Code related to replacing the functionality of the BIOS would be part of the emulator itself, and therefore would be written in the same language as the rest of the emulator - ANSI C. That would make this the best option when it comes to users being able to read and modify the code. However, naturally, this code is tied to my emulator and cannot be used with other emulators nor a real Mega CD. To some extent, there may be a performance upside to this approach, as my emulator would be running native code instead of running emulated code in a CPU interpreter and emulating a variety of additional hardware components. HLE code is also significantly easier to write than a custom BIOS, as HLE code does not need to interact with the underlying hardware that a true BIOS would, making me to free to implement functionality as I see fit.

I hope that this comparison has made it clear why I have opted for High-Level Emulation.

Performing Low-Level Emulation of either an original or custom BIOS is straightforward enough: just emulate the underlying hardware as with any other part of the Mega Drive and Mega CD hardware and then run the BIOS just like it were a game. While it is not simple in execution, it is simple in concept. High-Level Emulation is more complicated, due to it crossing the line between software and hardware. So, how exactly does one make a Mega CD emulator not require a Mega CD BIOS?

First, let's go over the boot process: using a real BIOS, this would be very simple: just boot the BIOS by resetting the Mega Drive's 68000 CPU with the BIOS's vector table mapped to address 0x000000, and the BIOS will handle communicating with the CDC and other hardware to load and execute the Initial Program (IP) and System Program (SP) from the CD. With HLE, however, the emulator must do this manually: when an attempt is made to reset the Mega Drive's 68000 CPU, the emulator must intercept this and load the IP and SP on its own, configure the Mega Drive and Mega CD to the expected state, and then allow the 68000 CPU to resume execution.

The BIOS is also responsible for interrupt handling, however it appears to mostly just bounce the interrupts to a secondary interrupt table in RAM, which can be modified by the game in order for it to install its own interrupt handlers. This can be recreated by simply populating the vector table and secondary table in RAM with the expected values on boot.

Next is the BIOS call process: when a SUB-CPU program wants the BIOS to do something, it stores a value into data register 0 and then jumps to address 0x5F22. In the original BIOS, the code at 0x5F22 is the start of a function which uses the value in data register 0 to select an action, which it then performs. These actions include lighting-up the LEDs on the front of the Mega CD, opening and closing the disc drive, playing music from the CD, and reading data from the CD. To recreate this with High-Level Emulation, I have to detect when the SUB-CPU has jumped to address 0x5F22. The way I do this is by exploiting the emulated 68000 CPU's bus mechanism. As a real 68000 CPU runs, it is constantly fetching code through 'bus events', which involves the CPU essentially pausing itself, signalling that it wants some data from an address, signalling that address, and then waiting for it to be given that data. This is very similar to a function call, and that is exactly what my emulator uses to emulate bus events. In the function, my emulator will check if the address and the CPU's program counter (the address of the code currently being executed) are both 0x5F22, and if so, it performs the action that corresponds to the value inside data register 0. The function will then return the machine code for an 'rts' instruction, causing the emulated 68000 CPU to immediately return to the code that it came from, as if it had ran a proper BIOS function.

Under-the-hood, my emulator is free to perform its actions however it wants, regardless of how the original BIOS did it, so long as it provides the same API. This allows me to make certain quality-of-life improvements that would not be possible if the emulator were using the original BIOS. For instance, Genesis Plus GX stores all of its Mega CD save data in a single file, which contains the contents of BuRAM. Because my emulator does not emulate BuRAM, however, it is free to deviate from what a real Mega CD does: notably, because the BIOS's BuRAM API is file-oriented, I can make each game's save data its own file on the user's PC!

And that's everything I can think of to say about High-Level Emulation: its upsides, its downsides, how it differs from Low-Level Emulation, and how it is done. I hope that this has been interesting. I realised that I really skimmed over this in my last post, which is unfortunate because the nitty-gritty technical stuff is my favourite part of the Dolphin, Citra, and Yuzu progress reports, and it's what I hoped to provide by starting a blog in the first place.
 
[Crosspost from the blog]

I was hoping to release this update after I finished adding support for the Mega CD, but progress on that has ground to a halt. Instead, the focus of this update will be the frontend! From features to refactoring to an entire port, here's what's new in clownmdemu!

Frame Advance
Frame Advance is a fairly mundane feature for typical users but a very handy tool for developers: it allows for advancing the game by only a single frame, which can be useful for examining a bug or verifying that animations occur correctly. It is activated by pressing the fast-forward hotkey while the emulator is paused, and can be combined with the rewind key to advance to the previous frame instead of the next.

At first, I figured that this would be an awkward feature to add, for code-flow reasons. However, the opposite turned out to be true: it couldn't have been more convenient to add!

Debug Logging Window
image-2.png

Previously, the frontend would output debug information to the terminal (known to you Windows users as the command prompt), but when emulation goes catastrophically wrong, so much debug information is output to the terminal that it causes the entire emulator to slow to a crawl and becomes unresponsive. To avoid this, debug information is now output to a Dear ImGui window. By default, logging is disabled, minimising the performance impact of the emulator issuing debug information in the background. Even when enabled, however, performance is still far better than before, with instances where the window is flooded with debug information still resulting in a responsive emulator. If, for whatever reason, information absolutely must be output to the console, then an option is provided to reenable it.

There is one downside to this: the logging window is very RAM hungry. However, to avoid crashes, the logging window will detect when RAM has ran out and clear the log, freeing much of the RAM and allowing the emulator to continue running normally.

Disassembler
In a Mega Drive cartridge or Mega CD disc, code is stored as machine code, which is essentially just a bunch of hexadecimal numbers.

This is Sonic 1's boot-code in machine code form:
image-1.png

This is very hard for a person to read, so the more practical way of viewing code is in assembly form. The process of converting machine code into assembly is called 'disassembly'. My emulator's frontend is now capable of automatically performing disassembly, allowing the code of the emulated game to be viewed with ease!

This is Sonic 1's boot-code in assembly form:
image-2.png

The 68000 disassembler is actually an off-shoot of my CPU interpreter library - clown68000. This is because, long ago, I made an effort to split the interpreter into two parts: the interpreter itself, and a kind of database library that describes the functionality of the 68000. The idea behind this was to minimise the work that would have to be redundantly repeated every time the interpreter was rewritten, or a new 68000-related tool was made. This plan ended up paying off, as the database library was not only used to automatically generate part of the interpreter, but now components of it are used by the disassembler. In particular, the instruction and operand decoding were made trivial by the library, allowing a quick-and-dirty prototype to be made in just one day. Being closely related to each other, the two now share a Git repository.

While this will surely be useful for the developers of ROM-hacks and homebrew, I'm hoping to use this for reverse-engineering games that don't work correctly in my emulator. In particular, I'm hoping that this will be the key to getting Sonic CD working.

Frontend Refactor
Originally, the frontend was written in ANSI C, but it became C++98 when Dear ImGui was integrated, as that was the language that it (and, more importantly, its API) were written in. Later, Dear ImGui switched to C++11 and the frontend switched with it. Throughout all of this, however, the frontend never made much use of C++'s features, remaining very C-style. This has finally changed, as now the frontend has been converted to proper C++: 'NULL' has been replaced with 'nullptr', references are used instead of pointers, casts are now C++-style, and many components has been split off into their own classes. The migration to modern C++ features should improve the frontend's code hygiene, such as through the more-explicit nature of C++-style casting.

The frontend has also been refactored to split much of the code from 'main.cpp' to separate files. 'main.cpp' was getting excessively large, which was making it hard to navigate, so I began splitting whatever I could to other files. This was done long ago with the debug menus, but poor encapsulation made them a bit of a mess. In this new wave, the audio stream was split to its own self-contained class, as was the window subsystem, the emulator wrapper, and the file dialogs.

68000 Interpreter Refactor
It is possible for an emulator to be excessively accurate: an emulator could recreate the exact behaviour of a console on the transistor level, but the game running on the emulator would behave exactly the same as it would on an emulator that recreates the console's behaviour on a logic-gate level. The only difference is that one emulator is far more performance-intensive than the other. There comes a point where additional accuracy does not benefit emulation, as the external behaviour is already perfectly accurate, even if the internal behaviour is not.

This same issue applies to CPU emulation. You may have heard the term 'cycle-accurate' before; this refers to the accuracy of the emulator's timing: on a given cycle (a fixed time-step that things like CPUs operate on), a cycle-accurate emulator's state (RAM, CPU registers, etc.) will be the exact same as the original hardware on the same cycle. Neither of the CPU emulators in my Mega Drive emulator are cycle-accurate: the closest one is my Z80 emulator, which is accurate only during the cycles on which an instruction ends. This is because instructions are executed over the course of multiple cycles on a real Z80, while my emulator completes every instruction instantly in a single cycle, and simply does nothing for the remaining cycles. This may sound like an unimportant technical detail, but this does affect when certain operations (such as accesses to the VDP's ports) occur. This creates a difference in behaviour that could cause the emulated game to behave differently. This is imperfect emulation.

To correct this, I could rework my CPU emulators to be 'truly' cycle-accurate. That is, on each cycle, the emulator does the exact same tasks as a real CPU. However, like described earlier, this would be overkill: many of the tasks done per cycle are strictly internal to the CPU, and are completely invisible to anything outside of it. Since a game exists outside of the CPU running it, this means that these internal behaviours are completely irrelevant to a game running exactly the same as it does on a real console. One example of such an invisible task is adding two numbers together using the CPU's registers. In contrast, a task that would not be invisible is sending the result of that addition to RAM, since the RAM exists outside of the CPU.

Since cycle-accuracy is too accurate, and being accurate only on the cycles that instructions end is not accurate enough, I have settled on the perfect in-between: being accurate only on the cycles that a bus event occurs on. A bus event is a transfer of data between the CPU and the rest of the system, making it the fundamental external task of a CPU. Hopefully you can tell where I am going with this: by making bus event behaviour accurate, I make all external behaviour accurate, and therefore make the behaviour of software running on the CPU emulator 100% identical to a real console (at least when putting aside other emulated components of the console that can influence code execution such as the bus and VDP).

With that massive preamble out of the way, I have been refactoring the 68000 emulator in preparation for making it accurate on a bus-event level. This involved splitting the instructions into multiple steps, so that they can be completed over the course of multiple bus events instead of all at once as they did before. Each step is made into a unique function, then pointers to these functions are grouped into lists, one per instruction, and then, when an instruction needs to be ran, it is done by calling each function in the instruction's list, with bus events occurring between each function call.

In hindsight, by doing all of this, I have implemented microcode into my 68000 emulator. While the emulator is still not yet accurate on a bus event level, all of the preparatory refactoring is now out of the way, leaving me with far less work to do to finally make the switch.

Improved High-DPI Support
On Windows, the emulator's frontend already enjoys high-DPI support, making its fonts as crisp as possible! I assumed that the code for this would work on other platforms too, but I heard from a Mac user that it was horribly broken!

What it should have looked like:
image-6.png


What it looked like:
image-5.png


Without access to a Mac, and no understanding of what could possibly be going wrong, I was unable to fix this. Around the same time, I noticed that the DPI scaling was overkill on Linux, causing the font to be far larger than it needed to be. With all of these issues in mind, I disabled high-DPI on any platform that wasn't Windows. This left Mac and Linux with blurry fonts (and blurry rendering in general), which I wasn't happy with.

High-DPI is one of the SDL2 library's shortcomings: while its support for the feature on Linux and Mac is good, Windows support was entirely missing for the longest time. More recently, it gained some support for Windows, but it had to be activated in a different manner to the other platforms and came with a bunch of caveats and edge-cases, defeating the whole point of SDL2 being a platform abstraction library.

I wanted to try again to implement high-DPI support on Linux, so I enabled the dormant original high-DPI code to see what would go wrong. When the emulator window appeared, I was surprised to see that it exhibited the exact same bugs as on macOS. As it turns out, on Linux (with Wayland, at least), SDL2 uses the same high-DPI mechanism as it does on macOS. This meant that, if I could fix high-DPI on Linux, then high-DPI on macOS would be fixed too!

At first, I tried supporting high-DPI the same way that Dear ImGui's SDL2 example does, but it was terrible: all it does is force SDL2 to convert the rendering coordinates from pixel coordinates to 'device coordinates', to match the mouse movement events and window size, which are also measured in device coordinates. Device coordinates remain the same across DPIs, whereas pixel coordinates get smaller and smaller, which is why using device coordinates universally is one way to support high-DPI. The problem with making Dear ImGui render using device coordinates manifests when using a DPI that is not a multiple of 100%, such as 150%: in this situation, the font and other native-resolution graphics will not be aligned with the screen's pixels as they are rendered, causing them to appear blurry, and also aliasing is introduced to the clip rectangle logic, causing letters to occasionally be cut off at an edge. The end result is extremely ugly rendering.

image-7.png

(Left: Good Rendering - Right: Garbage Rendering)

Appalled by this, I instead tried the opposite approach: rather than make the coordinates consistent by converting the renderer to device coordinates, I converted the mouse movement events and window size to pixel coordinates. This did result in awkward aliasing in mouse positions because SDL2 brilliantly only exposes mouse coordinates as integers instead of floating-point numbers, but otherwise this works perfectly. This does create more work for me though, as all of the calculations for rendering the frontend must be upscaled in accordance with the DPI because a higher DPI means more pixels. However, all of the work for this was already done when high-DPI support was added for the Windows port, since everything was already measured in pixel coordinates on that platform. So, in the end, all I did was make Linux and macOS behave like Windows, and everything magically worked! Gee, if only there was a library called SDL2 that did that... that would be great...

Web Browser Port
One of the main features of my emulator is its portability: the core emulator is written in portable ANSI C, the frontend is written in C++11 and only dependant on cross-platform libraries such as SDL2 and Dear ImGui, and the build system is CMake. In addition, while the build script supports linking system libraries, it is able to build these libraries manually if they are absent. All of this combined made the emulator almost immediately compatible with Emscripten!

For those that do not know, Emscripten is a toolchain that allows C and C++ to be compiled to either JavaScript or WebAssembly, instead of the usual CPU-specific assembly. JavaScript and WebAssembly can be embedded into a website, allowing it to be ran in a web browser. Emscripten also exposes various APIs to C and C++, allowing code to interact with the web browser to do things like render graphics and receive keyboard and mouse input. SDL2, which serves as a platform abstraction layer, supports Emscripten's APIs, granting software that is built upon it compatibility with Emscripten.

The 'main' Function
There is, however, one incompatibility between typical C/C++ code and Emscripten: the 'main' function. Normally, the 'main' function only returns when the program closes. For a constantly-running program like an emulator, this means that there needs to be an infinite loop inside the function. But, with Emscripten, infinite loops are not allowed. Because of this, software that targets Emscripten must instead use the function to register a callback, which Emscripten will then run on the function's behalf a specified number of times per second. This callback can be used to iterate the program in the same way that the function's infinite loop would have.

Because of this incompatibility, I did need to refactor my emulator's frontend slightly. It resulted in some nice decoupling, however: now, the emulator frontend and the 'main' function are entirely separate, with the frontend occupying its own source file and exposing an interface that allows for initialising, updating, and deinitialising the frontend. The 'main' function is the sole occupant of the 'main.cpp' source file, calling the frontend's iteration function in an infinite loop in standard builds, and registering it as a callback in the Emscripten build.

File IO
Another one of SDL2's shortcomings as a platform abstraction library is that it does not provide any way to create a file dialog to allow the user to select a file for the program to load or save. Because of this, my emulator's frontend manually implements these file dialogs for each platform, using the Win32 API for Windows, and Zenity and kdialog on Linux and the BSDs. Since Emscripten is compatible with none of these, it requires its own platform-specific code.

I was able to find a handy MIT-licensed single-header-file library that implements Emscripten file dialogs, however, its API was much higher-level than what the frontend was designed for. The reason for this is that, due to running in a web browser, software suffers from strict limitations, with one such limitation being that files on the user's computer cannot be directly accessed. Instead, software must ask the browser to access the file on its behalf.

Because of this, the library does not simply return the path of the file that the user selected: instead, for loading a file, the library makes the browser read the whole file into a memory buffer and then returns a pointer to it, and, for saving a file, the library takes a pointer to a memory buffer and makes the browser write its contents to the file.

While, previously, the tasks of reading and writing data to and from a file were the responsibility of the frontend, they now had to become the responsibility of a library. To achieve this, file IO had to be abstracted to operate purely on sending and receiving buffers instead of file paths. This abstraction layer would be implemented as a C++ class - the 'FileUtilities' class - which acts as a wrapper around the 'emscripten-browser-file' library in Emscripten builds, and standard file IO in non-Emscripten builds.

The Result
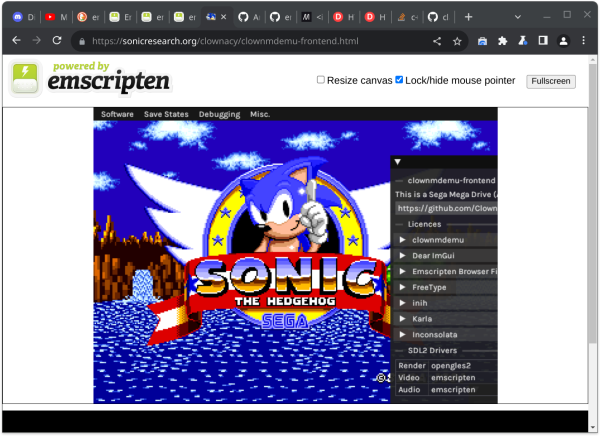
With all of this work complete, my browser is able to load and run games within the confines of a web browser!

image-3.png

What is great about this is that I can link to it directly from my blog's Projects page, allowing anyone that is interested in the emulator to try it out! It would be nice to do this with some of my other software too, such as ClownMapEd. With some work, I could even make this auto-load my various ROM-hacks, allowing them to be tried-out in the browser too!

If you're interested in trying this port out, you can find it at clownmdemu.clownacy.com.

Vastly-Improved Audio Playback
I have never been happy with the frontend's audio delivery system: due to emulation being synchronous, the frontend is not simply able to render audio on command, instead needing to wait for audio to be generated by the emulator before it is able to pass it on to the operating system to be played through the user's speakers. In order for there to not be gaps in the audio, audio must be generated as fast as it is played. However, the audio-generation process is extremely complicated (involving generating the audio output of two different sound chips - FM and PSG - at two entirely different sample rates - 53kHz and 224kHz - and then resampling them both to a common sample rate - typically 48kHz - and then mixing them together), meaning that audio is never exactly the correct size. Because of this, it's possible for audio to be generated slightly faster than it is played. When this happens, a gradual build-up of audio occurs, making the audio more and more delayed. For the longest time, this was worked-around by detecting when too much audio was being generated and simply throwing away some of the excess. This kept the audio from ever exceeding a certain amount and becoming latent, but also caused the audio to audibly 'skip', producing irritating popping and crackling sounds.

This problem came to a head when adding support for 50Hz (PAL emulation) to the Emscripten port: the popping was so annoying that I simply had to do something about it. I decided that I would make the frontend resample (stretch or squash) its audio in accordance with how much audio build-up there was. This way, there would be no skips in the audio, making playback as smooth as could be. I spent the next few days experimenting with different methods of making the audio playback speed self-adjusting. It was a demoralising few days, as everything I tried failed in one way or another: either the self-adjustment would be too weak and it would fail to respond to fluctuations in framerate, causing audio skips or latency, or it would be too aggressive, causing the audio to constantly warble as the pitch was greatly increased, only to be greatly decreased to prevent too much audio being generated, only to be greatly increased again to prevent too little audio being generated, and so on and so forth.

On the verge of giving up, I remembered that somewhere in RetroArch's documentation was a paper that described a method of 'dynamic rate control' that was just what I needed. I found it, implemented its formula, and was happy to hear it work perfectly! The frontend now adjusts the speed of its audio to always maintain a certain amount of generated audio at all times, preventing both skipping and latency. One of the RetroArch formula's features is that the speed adjustment is kept to a minimum, preventing the change in pitch from being audible. At last, the frontend's audio system is something that I can be proud of!

Unicode File Path Support on Windows
To end things off, here is a feature that I implemented just now! The frontend no longer has any problem with accessing files and folders whose names contain non-ANSI characters. This means that if you have a file whose name is written in Japanese in a folder whose name contains emojis, then the frontend will be able to load it! Previously this would just fail, as the internal way of encoding strings was incompatible.

Unfortunately, the font system doesn't support the entirety of Unicode, so many characters will appear as question marks when viewed in the frontend itself, like in the 'Recent Software' list.

Closing
So here it is - one big update! How typical of me to want to implement Mega CD support, only to end up doing a whole bunch of other things instead. Hopefully these new additions will be enough to tide people over until then!

Source code: https://github.com/Clownacy/clownmdemu-frontend
Windows executable: https://github.com/Clownacy/clownmdemu-frontend/releases/tag/v0.5
Try it in your web browser: clownmdemu.clownacy.com
 
Last edited:
v0.5.1
Try it in your web browser: clownmdemu.clownacy.com
Windows EXE: https://github.com/Clownacy/clownmdemu-frontend/releases/tag/v0.5.1
Source code: https://github.com/Clownacy/clownmdemu-frontend

Even-Further-Improved Audio Playback
It was pointed out to me that my Mega Drive emulator has another source of audio distortion: while v0.5 had managed to fix the audio skipping that was caused by audio being generated too quickly, there was still crackling that was caused by the FM or PSG audio being truncated by 1-3 samples every frame.

The reason for this is that the audio resampling process is prone to rounding error, meaning that if 400 samples were desired, 401 samples may be produced instead. Because there are two resamplers running simultaneously (one for the FM audio and one for the PSG audio), it's possible for each of them to output a different number of samples. When this happens, the number of samples which are output is capped to the smaller of the two. This causes the audio with the larger number of samples to skip slightly, creating a crackling noise.

At first, I tried fixing this by making the recently-added dynamic audio sizing system apply to the FM and PSG audio separately, but, while this did eliminate the crackling noise, it caused the two audio sources to frequently desynchronise with each other, causing music to play with disjointed timing.

A proper fix was achieved by reworking the resamplers to always generate an exact number of samples. By doing this, the FM and PSG audio are always perfectly synchronised, and no excess audio frames are produced. At last, perfect audio delivery!

Frontend Debugging
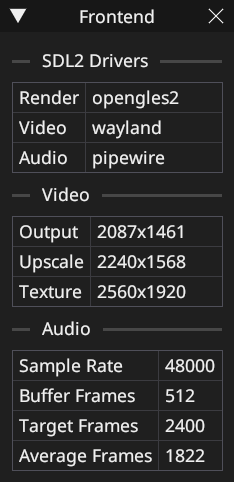
While working on v0.5's dynamic audio sizing system, I became interested in monitoring the audio buffer. I had added some code to print statistics to the debug log, but this was messy and so it was never included in the released version. Even once the system was complete, I wanted to be able to keep on eye on how it was operating to ensure that it was working correctly. Instead of keeping the hacked-together debug logging code around forever, I made it into a proper debugging menu!

image-2.png


Various useful little bits of information are displayed here, particularly the target and average numbers of audio frames. The closer these numbers are; the better: if the average becomes too low, then audio drop-out occurs, and if the average becomes too high, then latency occurs. Additionally, there are statistics for the framebuffer upscaling, which is nice for ensuring that the non-integer scaling is working optimally. The list of SDL2 drivers has been moved here from the About menu too, making it easy to see which APIs SDL2 is taking use of. Here you can see my painfully contrarian OpenGLES2, Wayland, and PipeWire configuration. Because OpenGL 2.1, X11, and PulseAudio are so last year.

C++ Refactoring
The frontend has been receiving more C++ refactoring to make it less C-like and more exception-safe. Particularly, instead of using 'fake' constructors and destructors that are just regular methods, the frontend's classes have been converted to use real constructors and destructors. This had many implications for field lifetime and initialisation, requiring even further refactoring. I've also eliminated the need for manually-defined destructors from a number of classes, leveraging smart pointers and the like to make the automatically-generated ones sufficient.

The strictness of object-oriented code has helped expose a number of design deficiencies already, such as the configuration loader calling methods of the audio output object before it had even been initialised. It has also encouraged better factoring of the code by nudging me towards splitting the audio device logic from the audio queuing system, which coincidentally makes it simpler to port to other APIs. Overall, I've enjoyed getting to know modern C++ better, and think that it benefits the codebase quite a bit.

Hopefully, this shake-up to the codebase has not introduced any bugs nor instability. If it has, expect to see some small hotfix updates in the coming days.
 
[Cross-post from the blog]

Recently, I fixed a couple of inaccuracies, and I thought they would be interesting to read about:

Fixed the Title Cards in Sonic Crackers
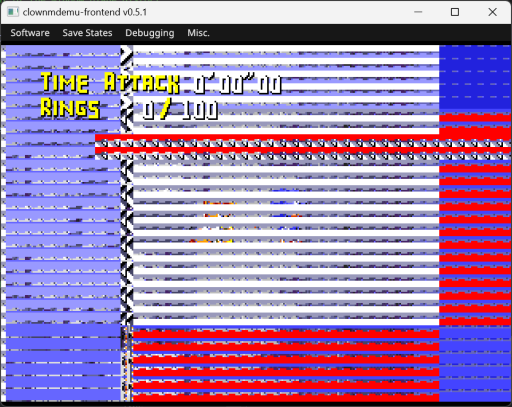
I've tested many Sonic games and ROM-hacks in my emulator, but I've never tried the famous Chaotix prototype - Sonic Crackers. If I did, I would have noticed an obvious bug that affects its title cards:

image.png

(It may be hard to believe, but this is not what it's supposed to look like).

This bug had flown under the radar for over two years until it was helpfully pointed out to me in a GitHub Issue. I found this bug very interesting because it appeared to stem from a mature and battle-tested part of the VDP emulator, so I was surprised that there was still an inaccuracy within it.

Upon investigation, I discovered that the bug in my emulator was being triggered by a bug in Sonic Crackers! The tiles for the title card are uploaded using DMA transfers, however the game's DMA transfer routine is bugged: immediately after performing the DMA transfer, the routine attempts to reupload the first word of tile data (this is presumably to work around a known bug in early Mega Drives that causes the first word of a DMA transfer to be corrupt), however, it accidentally only writes half of the address command. This is important, as, when half of an address command is written to the VDP, a 'latch' flag is set to signal that the next word written will be the command's other half. The DMA transfer routine will then loop and begin to prepare another DMA transfer, starting by writing a register command for the DMA length. Because the latch flag is set, however, this register command is instead interpreted as the second half of an address command, completely breaking the DMA transfer, causing the bug that is seen above.

This is not the case on a real Mega Drive: there, the register command is processed correctly, allowing the DMA transfer to successfully occur. This shows that the latch flag only applies to words that are not register commands, whereas my emulator was making it apply to all words, register command or otherwise.

But that is not the only issue that this bug exposes: later in the routine, an address command is written to the VDP in order to trigger the DMA transfer. With the latch flag still set, the emulator would receive the first half of the command, notice that the latch flag is set, and use it as the previous, incomplete command's second half. As with before, this breaks the DMA transfer.

Once again, this is not the case on a real Mega Drive. The most likely reason being that the latch flag is cleared whenever the VDP receives any word, even if it isn't part of an address command, preventing the DMA transfer from being broken by the incomplete address command.

Addressing both of these inaccuracies finally allows the title card to work properly:

image-1.png

(It may be hard to believe, but this is what it's supposed to look like).

This issue illustrates why accuracy is so important to emulators: while well-behaved code will obediently follow the rules to the letter, bugs will invoke all kinds of edge-cases and undocumented behaviour that no sane code ever would. In this case, Sonic Crackers' bugged code relied on quirks of the VDP's address command latching behaviour that would never be tested in normal circumstances.

Fixed the Data Select Background in Sonic 3
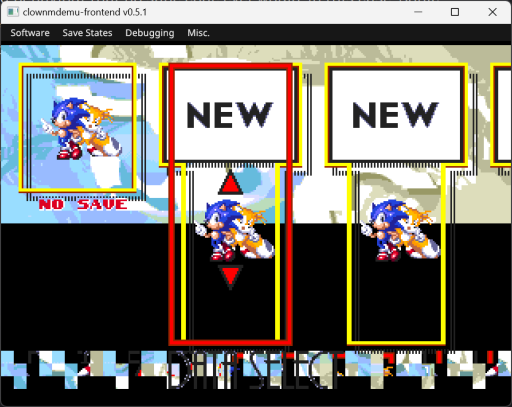
A longstanding bug has finally been fixed! Ever since Sonic 3 first booted in this emulator, the background of the Data Select menu has looked like this:

image-2.png


With the help of the emulator's debugging menus, I could see that the background's rows had been split into two groups:

image-3.png


This struck me as very, very odd, as there is no way that this could ever work on a real Mega Drive: what's happening is that the game has set the VDP to render in 128x32 mode, but it has loaded the background in 64x32 mode. There is no bug here: this is what the game actually does, and the VDP is doing exactly what it should in response.

So why is it that this works on a real console? The foreground needs to be in 128x32 mode to fit its graphics, and it's not possible for Plane A and Plane B to be different sizes. So how could Plane A possibly be correctly displaying 64x32 data in 128x32 mode?!

That is a trick question - did you figure it out? Here's the answer: the background is not displayed by Plane A - it's displayed by the Window Plane. Yep, that obscure feature that's never used by Sonic 1 and 2 is used for a menu background of all things in Sonic 3.

But what's special about the Window Plane? Well, one of its "features" is that, unlike Plane A, it cannot scroll. Because of this, being 128x32 would make no sense for the Window Plane, as most of it would be forever off-screen. As a result, the Window Plane is hardcoded to either 64x32 and 32x32, depending on what resolution the game is rendering at. I never knew about this hidden gimmick, so when I added Window Plane emulation almost a year ago, I made it match the size of Plane A and Plane B.

Fixing this makes the background display correctly at long last:

image-4.png
 
Last edited:
(Cross-post from the blog).

v0.5.2
Here is a small update that fixes a few inaccuracies in order to get more games working.

Try it in your web browser: clownmdemu.clownacy.com
Download: https://github.com/Clownacy/clownmdemu-frontend/releases/tag/v0.5.2

Fixes for Sonic 3's Data Select and Sonic Crackers' Title Cards
I have already covered this in another post, but for those not in the loop, the VDP emulation logic contained a few inaccuracies that caused visual corruption in a couple of Sonic games. These issues have now been addressed, allowing these games to work as they do on real Mega Drives.

image.png
image-1.png

image-2.png
image-4.png


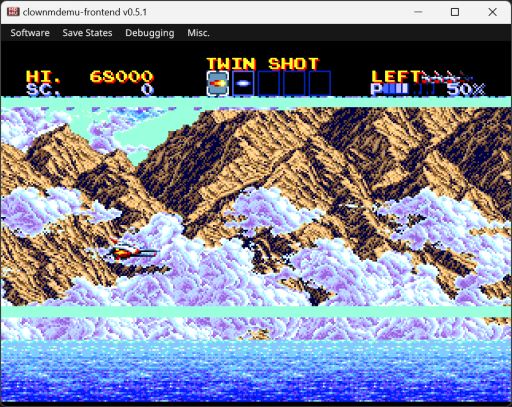
Fix for Thunder Force IV's Gradual Corruption
A user, Pinkerton, recently pointed out a very strange bug: the game Thunder Force IV would start off working fine, but gradually corrupt over time.

image-5.png
image-6.png


This is unlike any bug that I have ever seen before in this emulator: games usually either work or they break completely - they do not slowly corrupt little by little whilst otherwise remaining completely stable.

An invaluable tip that Pinkerton provided was that the debug log kept mentioning the use of the 'STOP' instruction, which is a 68000 CPU instruction that was not yet emulated. I noticed that the Sega splash screen was playing at too fast a speed, so it was apparent that the screen was using the STOP instruction for controlling its framerate. The rest of the game played at the correct speed, and the debug log stopping complaining about the STOP instruction after this screen was over, so it was clear that only the Sega screen used the STOP instruction. Still, I figured it would be worth implementing the STOP instruction to get the screen working properly, then afterwards I could focus on the graphical corruption.

The STOP instruction is not used by the main Sonic games, so I am not very familiar with it, hence why it was not emulated. Upon researching it, I found that the instruction essentially causes the 68000 to cease processing instructions until an interrupt occurs. Given that there is an interrupt - Vertical Interrupt - that occurs once per frame, this instruction becomes a useful way of idling the CPU until the next frame. It would be unfortunate if no interrupts were set to occur, as the CPU would end up waiting forever, so the STOP instruction is also able to set which interrupts are enabled and disabled.

Implementing the STOP instruction only took a couple of minutes and a few lines of code, and, with that done, the Sega screen was running at the correct speed. Surprisingly, this also fixed the gradual graphical corruption in the game itself!

But how? The main game does not even use the STOP instruction! My guess is that the game relies on the STOP instructions in the Sega screen to set the interrupts to a sane configuration, and that, without it, the game would receive interrupts whilst performing sensitive operations like communicating with the VDP, causing said communication to be corrupted and leading to the graphics being broken.

Regardless, I am glad to have fixed the bug. Thunder Force IV was a game that I was meaning to try out sometime, so it's nice that I can play it in my emulator.

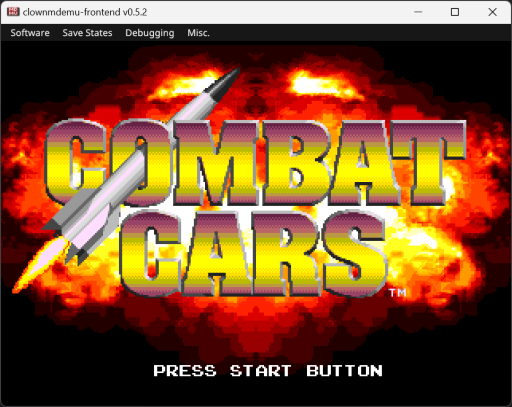
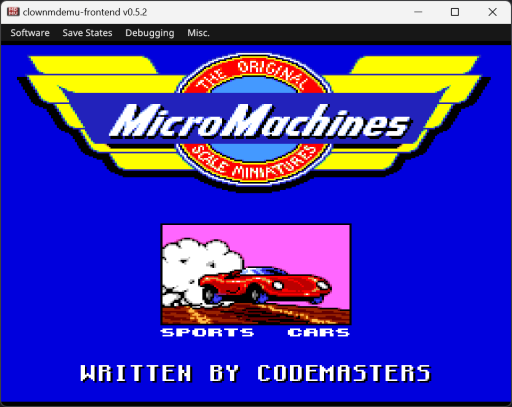
Get Combat Cars, Micro Machines, Dynamite Heady, and Gunstar Heroes to Boot
For as long as my emulator has existed, it was unable to boot Combat Cars and Micro Machines, even after massive improvements in accuracy to both the 68000 and Z80 interpreters. This has always stumped me.

After informing me of the bug in Thunder Force IV, Pinkerton also noted that two Treasure titles - Dynamite Heady and Gunstar Heroes - failed to boot. With the new 68000 disassembler, I set about diagnosing the issue.

I was surprised to see that the games were stuck reading from the Z80 bus request register. To my knowledge, reading that register will provide a flag that indicates whether the bus request is in-progress or not. The Sonic games frequently wait for this flag to be clear. However, these Treasure games were different: they were waiting for the flag to be set instead. Because my emulator does not work like an actual Mega Drive, bus requests complete instantaneously, so the flag is never set. Because the flag is never set, the games wait indefinitely, resulting in their failure to boot.

Upon looking into the details of the bus request register, I discovered that I was wrong about what reading the register does: the flag provided does not indicate whether the request is in-progress, but rather whether the bus is held or released. What this means is that, if you're releasing the bus, you wait for the flag to be set, and, if you're requesting the bus, you wait for it to be clear.

With this inaccuracy corrected, Dynamite Heady and Gunstar Heroes now boot!

image-7.png
image-8.png


Not only that, but I later noticed that Combat Cars and Micro Machines finally boot too!

image-9.png
image-10.png


According to Pinkerton, this change gets Alien Soldier to boot as well!

Bonus: Struggling with Windows XP Compatibility
Going back to at least the second release of this emulator, I have tried to maintain compatibility with Windows XP. Why? Because I can, and because it was pretty convenient: the frontend's main dependency, SDL2, supports Windows XP, and Visual Studio provides a (deprecated) toolchain for targeting Windows XP. I also figured that maintaining XP support was a good way of benchmarking the frontend's portability: if it doesn't run on Windows XP, then what are the odds of it running on niche homebrew platforms?

Recently, I set up a Windows XP virtual machine just to test this emulator, so I could enjoy the satisfaction of seeing it running. I double-clicked the EXE and... it failed. No error messages at all; it just failed.

I did some research, and found that Visual Studio broke its Windows XP compatibility after version 16.4. This affects the runtime library, which I normally link statically. Switching to dynamic linkage and installing an older runtime library on Windows XP should bypass this issue, so I did just that. The emulator still crashed.

At this point, I considered Visual Studio to be a dead-end, and decided to switch to an open-source toolchain instead. MSYS2 would have been a good option, but it not only dropped support for Windows XP, but also Windows 7, so that would not work here.

That left one more option: Arch Linux's MinGW-w64. Years ago, I used it to produce Windows XP-compatible builds of the Sonic 1 and 2 remasters. I rebooted into Linux, installed the appropriate packages, cross-compiled the emulator, copied the binary over to my virtual machine, double-clicked it, and... it failed.

This time was slightly different: the error message mentioned a missing DLL import, that being the function GetTickCount64, which was added in Windows Vista. This was a known issue with MinGW-w64's libwinpthread. A recent commit from the end of 2023 should have fixed this, but it appears that this has not yet been released in an update. Fortunately, an Arch User Repository package is available for compiling the latest libwinpthread sources. With that done, I built a new binary and ran it. It still crashed.

Well, damn. Now what? At this point I was well and truly defeated, and gave up. Windows XP support with a modern toolchain is infeasible in 2024... or so I thought. Just this morning an idea occurred to me: what if SDL2 was failing to initialise because hardware acceleration was not available? VirtualBox no longer provides hardware acceleration to Windows XP guests, and SDL2 tries to create a hardware accelerated renderer before falling-back on its software renderer, so perhaps the emulator would work if I just forced SDL2 to skip hardware acceleration. To do this, I had to set the 'SDL_RENDER_DRIVER' environment variable to 'Software'. After that was done, I ran the EXE and...

image-11.png


It works!

Unfortunately, this is not as convenient as compiling with Visual Studio on Windows, but I think that it is acceptable given that I already have to switch to Linux to compile the Emscripten port. This may be the very first release of the emulator whose pre-built EXE actually works on Windows XP! Though, that does not mean that the EXE will run badly on modern versions of Windows either: it will still support high-DPI displays and leverage newer Windows APIs like Direct3D 11 and WASAPI! That is the magic of SDL2, dynamically bridging the gap between the program and the operating system's underlying APIs!
 
Last edited:
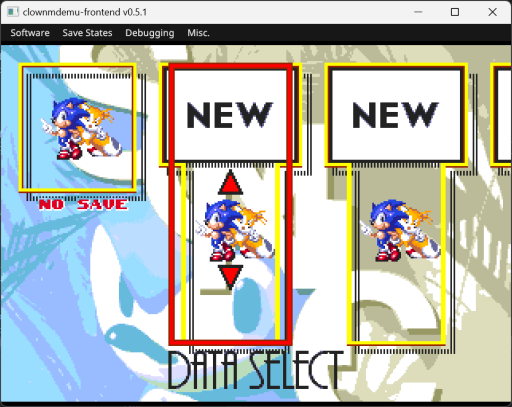
(Cross-post from the blog)

v0.6
Try it in your web browser: clownmdemu.clownacy.com
Download: https://github.com/Clownacy/clownmdemu-frontend/releases/tag/v0.6

Recently, I have been informed of various games that do not work correctly in my emulator by BlastBrothers, who has opened several issues on the emulator's GitHub repository.

Properly Initialised Emulator State
One of these issues mentioned missing audio in Battletoads: upon booting, the title screen would not play any music. Despite this, music would play when starting a level, and the title would play music if the game is reset. These quirks suggested that this was an matter of the emulated Mega Drive having invalid state upon boot.

After some investigation, I found that the Z80's bank was not being initialised at all. This caused it to default to the value of the memory that it occupied, which, on x86 Windows at least, is 0xCD. Because the Z80 bank was set to such an unusual value, the game's sound driver was reading music data from the wrong location, causing no music to play.

It is worth mentioning that this would not have been an issue were the emulator written in C++ rather than C, as class field variables are always properly initialised, be it explicitly or implicitly. Using C means that I have to do all of this manually; there is no safety net here.

Vastly-Improved VDP Command Behaviour
Another game that was misbehaving was The Adventures of Batman & Robin, which had missing and corrupt graphics in its opening:

image-14.png
image-15.png


Additionally, there were various Electronic Arts games whose EA splash screen did not appear correctly:

image-16.png

(This looks pretty cool in motion).

What these both had in common was the debug log being flooded with warnings about invalid access modes and the VDP being written to while it was in read mode. It appeared that communications with the VDP were going horribly wrong. This struck me as very odd, considering that I had recently made VDP communication far more accurate in order to get Sonic Crackers working correctly.

To debug this, I consulted Nemesis's VDP test suite (yes, the same Nemesis that the compression format is named after). His test suite is a ROM that you run on a Mega Drive emulator to verify the accuracy of various behaviours. Safe to say, my emulator does not pass many tests:

image-17.png


What was interesting was that the emulator did not pass the 'partial command port writes' test. I found this strange because I thought my emulator did support those: partial commands are cached and later combined with their missing halves when they are sent by the 68000. Is that not what a real VDP does?

As it turns out, no, it is not. As this incredibly useful document by Genesis Plus developer Charles MacDonald explains, the VDP actually applies partial commands immediately, and does not wait for their missing halves to arrive. This means that any software which relied on this behaviour was operating on outdated VDP state, as the commands that were being uploaded were not doing anything. I also found that my previous understanding of command latching was completely incorrect, and only worked in Sonic Crackers by complete accident.

After addressing these inaccuracies, the two games began looking much better!

image-18.png
image-19.png
image-20.png


This massive overhaul also incidentally fixed the stray pixels in Mega Man: The Wily Wars. It has been a long time coming!

image-1.png
image-12.png


Improved Accuracy of DMA Fill

Despite all of these improvements, Thunder Force IV continued to display garbage in its opening:

image-21.png


MacDonald's document helpfully pointed out that this game required accurate DMA Fill emulation. DMA Fill is a feature that allows VRAM to be filled with a repeated value (though undocumented, CRAM and VSRAM can be filled as well). I thought that I had already implemented this accurately, yet, once again, it turns out that I had not. Oddly, when writing each byte, a real VDP does so to the current address XOR'd with 1. I do not understand why it does this. Regardless, my emulator failed to reproduce this behaviour, apparently causing the above bug. After applying a simple fix, the bug disappeared!

image-22.png


Made 68000 Byte Writes More Accurate

There was one small problem with the previous fix - it broke Wily Wars:

image-13.png


But how could this be? Even Nemesis's test ROM confirmed that this was the correct way to emulate DMA Fill! After over an hour of debugging, my mind was not changed: my emulator was absolutely working correctly. So then why was this bug happening?
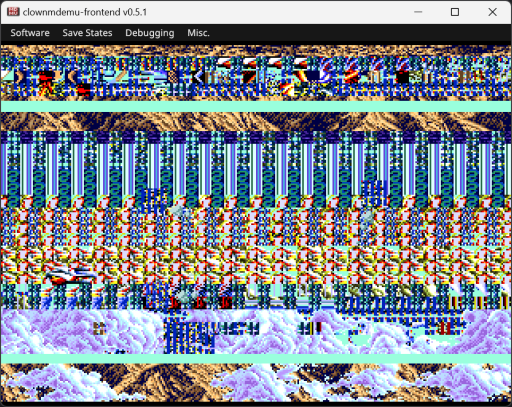
As a reminder: Wily Wars uses DMA Fill to create several blank tiles in VRAM. This is what they normally look like:

image-37.png


The problem is that the third and fourth pixels of each tile are not being set by the DMA Fill, causing a 'hole' to appear in them.

To explain why this could not be a problem with the DMA Fill itself, I shall go over how a DMA Fill occurs:

The final step of activating a DMA Fill is a standard memory write: this causes a word of data to be written to the destination memory at the current index, after which the index is incremented. Following this, the VDP enters a loop of writing the upper 8 bits of the word to the destination memory at the current index XOR'd with 1, until its counter reaches 0.

Let us illustrate this more directly; here is what happens when a DMA Fill of 0xFF is performed at index 0 with an increment of 1 and a length of 3:
  • Standard memory write occurs, writing 0xFF00 to address 0.
    • 0xFF is written to address 0 (0 XOR 0).
    • 0x00 is written to address 1 (0 XOR 1).
    • Index is incremented to 1.
  • Byte-writing loop begins:
    • 0xFF is written to address 0 (1 XOR 1).
    • index is incremented to 2.
    • 0xFF is written to address 3 (2 XOR 1).
    • index is incremented to 3.
    • 0xFF is written to address 2 (3 XOR 1).
The result of all of this is that the four bytes starting at address 0 are 'FF 00 FF FF'. Since a tile is 4-bits-per-pixel, this explains why the third and fourth pixels of each one is missing. The DMA Fill is working exactly as it should, so how does Wily Wars rewrite the skipped pixels, and why does it not work in my emulator?

To find this out, I used my emulator's handy disassembler to view the code in the game that was triggering the DMA fill. Here it is:

Code:
0006CAF8: movea.l 4(sp),a0
0006CAFC: lea     ($C00004).l,a1
0006CB02: move.w  sr,-(sp)
0006CB04: ori.w   #$700,sr
0006CB08: move.w  #$8F01,(a1)
0006CB0C: move.w  ($FFBE8C).l,d0
0006CB12: bset.l  #4,d0
0006CB16: move.w  d0,(a1)
0006CB18: move.l  $12(a0),(a1)
0006CB1C: move.w  #$9780,(a1)
0006CB20: move.l  $1C(a0),(a1)
0006CB24: move.b  7(a0),-4(a1)
0006CB2A: move.w  (a1),d0
0006CB2C: btst.l  #1,d0
0006CB30: bne.s   $6CB2A
0006CB32: move.w  ($FFBE8C).l,(a1)
0006CB38: move.w  #$8F02,(a1)
0006CB3C: move.w  (sp)+,sr
0006CB3E: rts


What is most important is the 'move.b 7(a0),-4(a1)' instruction. This is the instruction which specifies the value to fill the RAM and ultimately triggers the DMA Fill. Normally, this instruction writes a word ('move.w'), but this one moves only a byte ('move.b'). As soon as I saw this, I knew exactly what the problem was.

While reading posts on the SpritesMind forum, I learned of a quirk of the 68000 that my emulator did not recreate: when performing byte-sized memory writes, the 68000 will repeat the byte in the top and bottom 8 bits of its external data bus. Since the VDP only supports word-sized port accesses, it will read both of these bytes together as a single word. This means that Wily Wars' code, rather than writing 0xFF00 to the VDP, is writing 0xFFFF.

Following the above steps again, but using 0xFFFF instead of 0xFF00, produces 'FF FF FF FF' rather than 'FF 00 FF FF'. This is why Wily Wars does not have holes in its tiles on real Mega Drives.

Correcting this fixed Wily Wars once more!

image-12.png
 
Implemented DMA Copy

There is not much to say about this one: I do not know of a single game that uses DMA Copy, but Nemesis's VDP test suite includes a few tests for it, so I figured that I would finally implement the feature.

DMA Copy copies bytes from one place in VRAM to another. It shares DMA Fill's quirk of XOR-ing the destination address with 1, but DMA Copy also XORs its source address. Its other quirk is that it always increments its source address by 1, not by what the destination address increment register has been set to.

I was able to make this share most of its code with DMA Transfer, so the two might share circuitry in a real VDP.

Made Debug Log and Disassembler Output Copyable

This is a small usability improvement to the frontend: the Debug Log and 68000 Disassembler windows now allow the user to select their text. In particular, this is for copying the text and pasting it elsewhere. For instance, the user could disassemble a function and then copy it into a text editor for further analysis or even to use it in their own project. Likewise, the debug log can be copied for pasting into a GitHub issue to report a bug.
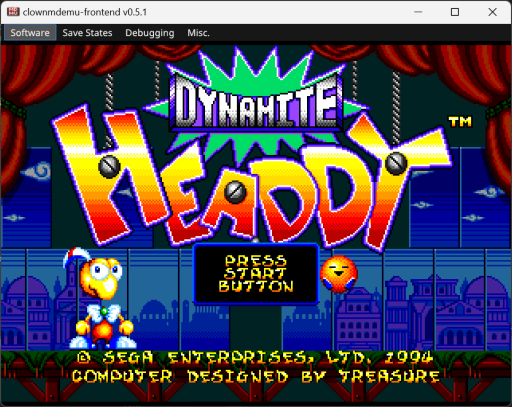
Moved Configuration Files to Standard Location

The frontend has two configuration files, and, up until now, they have always been located in the 'working directory', which is usually where the executable itself is. If the emulator is ran via the command line, however, then the working directory will be whichever directory the command line is currently viewing. This can lead to configuration files cluttering various user directories without warning.

To solve this problem, configuration files are now stored in a standard per-user location. On Windows, this will be the 'AppData' folder, while, on Linux, it will be '.local/share'. As well as avoiding clutter, this has the added benefit of making all copies of the emulator share a single set of configuraion files. No more changing the keyboard bindings for the umpteenth time just because the EXE had been moved to another folder.

Improved Accuracy of Sprite Masking and Overflow

The Mega Drive has a limit to how many sprites it can render at once: there is a limit on how many sprites can be drawn across the whole screen, and there is a limit to how many sprites and pixels can be drawn on a single horizontal line. When this limit is reached, sprites simply stop being drawn. This can lead to graphics disappearing or flickering during heavy sprite usage, such as when defeating a boss in Sonic Spinball. One place that this can easily be seen is in Sonic the Hedgehog's Spring Yard Zone boss battle:
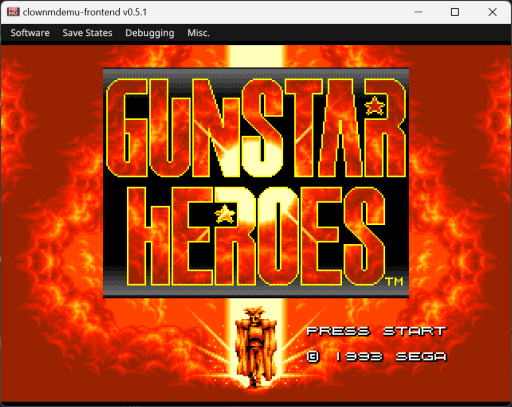
image-23.png


Here, the blocks along the bottom of the screen combined with the lives counter result in the pixel limit being reached, causing parts of the blocks to vanish.

The game's title screen makes use of this to achieve a particular effect: numerous junk sprites are placed off-screen in order to reach the sprite limit, making the bottom of Sonic's sprite disappear. If it were possible to see all of the sprites that the game is rendering, including the off-screen ones, here is what it would look like:

image-33.png


Were the sprite limit not emulated, the title screen would look very odd:

image-25.png


However, there is another way to hide parts of sprites like this: if a sprite has an X coordinate of 0 (which is very far off-screen to the left), then no more sprites will be rendered on the lines that it occupies. This type of sprite is known as a 'sprite mask'. Sonic the Hedgehog 2 made use of this feature for its title screen, allowing it to achieve the same effect as its precursor without the need for so many junk sprites.

image-34.png


Sprite masking and the sprite/pixel limits have many edge-cases and little-known behaviours, meaning that many emulators do not emulate them accurately. To help make this a thing of the past, Nemesis created yet another small but exhaustive test suite.

I had actually used this to improve my emulator long ago, however there was a certain test that always failed:

image-29.png


This one had to do with a particularly odd edge-case within another edge-case: a sprite mask will not prevent sprites from being drawn if no other sprites have drawn before it unless the previous line reached its pixel limit. While this is simple enough to comprehend, I did not want to have to write a mess of spaghetti code to recreate the behaviour, so I left it unaddressed until I could come up with an elegant way to implement it. Fortunately, I finally came up with such a solution, and now all tests finally pass:

image-30.png


On another note - you might be wondering what I was using to see those offscreen sprites earlier. Well...

Added a Sprite Debugger

At long last, two years after adding debuggers for everything else, I have finally made a sprite debugger! In fact, I made two:

image-36.png


As seen in this image, one debugger lists each sprite in detail, while the other shows how the sprites are composed into the final image. Notably, sprites can be drawn far off-screen, and this debugger allows them to be seen! Additionally, with this, the Mega Drive's rendering can be dissected down to each and every layer!

image-37.png


Wrapping Up

And that is everything of note in this update! Not since v0.4 has this emulator seen such a slew of fixes and features! Like with v0.4, development may slow down for a while after this, as writing such a big blog post and working on one project so much can cause quite a bit of burn-out. Hopefully this update is stable and user-friendly so that there is no huge need for another update any time soon.
 
Back
Top